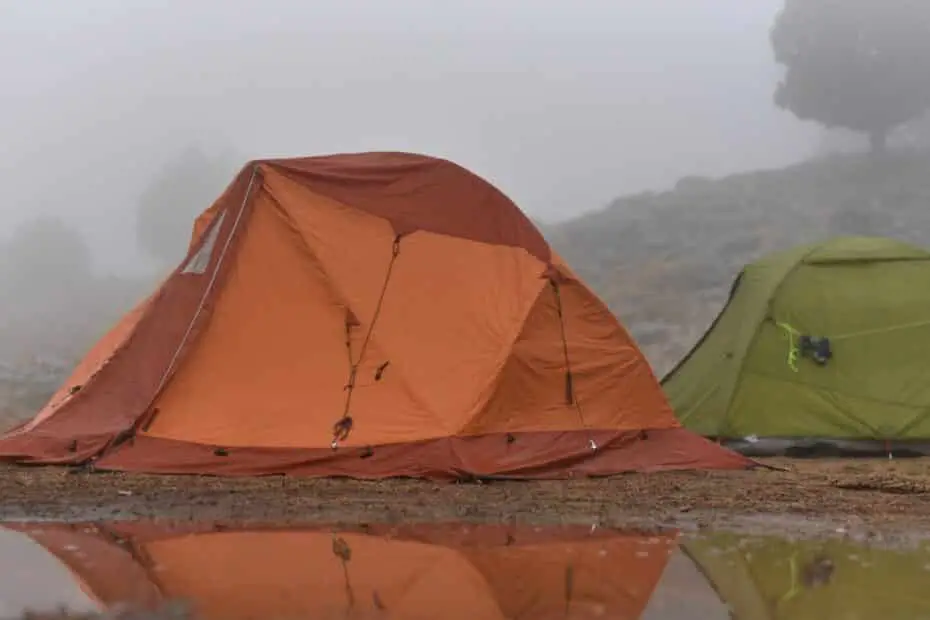
Anybody that regularly goes camping will eventually get caught in the rain. A little bit of rain doesn’t have to ruin your trip, but setting up a tent in the rain can be a challenge. The inside of your tent will be soaked with rain if you don’t know what you’re doing. You can avoid that problem by following this guide where I explain How to set up a tent in the rain.
Camping in the rain isn’t anybody’s idea of the perfect trip, but unfortunately there’s no 100% accurate way to predict the weather. The weather forecast can look perfect all week and suddenly change as you’re jumping in the car to head out.
Don’t cancel your trip just yet! You can still have fun camping in the rain, but you’ll need to know a few simple tips to get started. So how do you set up a tent in the rain without soaking the inside of your tent?
Table Of Contents
How To Set Up A Tent In The Rain
I’ve had to pitch a tent in the rain countless times, and you always run into the same problems. The inside of your tent gets wet during setup, you track water into the tent, or bring wet gear inside. I’ll teach you how to deal with each of these issues and go over everything else you need to know.
You also need to learn how to choose a campsite to avoid flooding issues. Choose a safe campsite without falling objects or the risk of getting struck by lighting. Deal with waterproofing, drying wet gear, and testing/fixing leaks. Plus give you a few options to improve ventilation and eliminate condensation.
Once your done with this post, I highly recommend checking out my camping the rain ultimate guide. It goes over every other aspect that you need to know about camping in the rain.
Here’s A Few Quick Tips To Help Pitch A Tent In The Rain!
1. Wait For The Weather To Clear Up

This should seem fairly obvious, but do you actually need to set up your tent in the rain? Check the weather forecast and see how long it will take for the rain to stop. If there’s any chance that the rain will stop in the next 30-60 minutes consider waiting out the storm.
Toss on your rain gear and pick a safe tree to take cover for a bit. This will give you a chance to see where water pools up and you won’t have to deal with rain soaking through the mesh roof of a double wall tent.
This isn’t always possible, but it’s better to start off on a positive note. I’ll go over ways to minimize the risk, but rain will find a way inside your tent. It can lead to condensation issues if you don’t learn how to deal with it.
2. Make A Sheltered Area With A Lightweight Tarp
Use a tarp to create a sheltered area, while you set up a tent in the rain. Your sheltered area will serve two purposes: it gives you a place to stay dry while you’re hanging out and you also have cover while pitching your tent in the rain.
I recommend setting up the tent so the back edge of the tarp goes barely over the mesh section of a double wall tent. You can go back farther with a single wall tent, but make sure your doors/windows are zipped up to keep out rain.
You can use any tarp to set up a sheltered area, but I recommend purchasing a “Real” camping tarp. They’re a little bit lighter than regular tarps like you’d find at Home Depot, Lowes, etc. and much easier to fold, pack, and handle. I use Redcamp waterproof camping tarps, since they’re cheap and durable, but there are lighter options available for like 4 times the price.
If pack weight isn’t a concern for hiking, I recommend buying the largest tarp you can find. A massive 9ft by 13ft Redcamp weighs less than 3lbs so it really won’t add that much weight to your pack anyway. I’ve been known to carry a second tarp and extra guy lines when there’s a high chance of rain. It gives you extra space to sit and dry out all your gear.
How To Build A Sheltered Area With A Tarp
Creating a sheltered area with a tarp is easy. Just run a single guy line between two trees at your preferred height. Tie a guy line to each corner of the tarp, pull out each corner, and stake down your lines. You can set up a tarp without trees, but you’ll need additional support poles to act as makeshift trees.
Check out my post explaining how to hang a tarp over a tent without trees for more info.
Just make sure you angle the tarp with the back edge past the center of your tent. That should force the rain to drain away from your seating area. You don’t want to sit in a muddy mess and have water running into your door.
3. Tree Cover To Protect Your Tent From The Rain (Avoid Falling Objects)
Use tree cover to shelter your tent from rain and reduce the risk of condensation forming inside the tent. You just need to be careful when setting up the tent. It’s extremely common for dead or loose hanging tree branches to fall during a storm.
Look up into the tree canopy to check for dead branches and hanging limbs (aka widowmakers). It’s rare for a healthy branch to break loose, but that’s also possible in heavy rain. I had a 1 inch branch tear through the roof of my garage and make its way into the finished area below. If a smallish branch can rip through a plywood roof, it can easily tear through your body.
Also keep an eye out for pinecones, acorns, and any other type of fruit. An acorn bonking you on the head, probably wouldn’t kill you, but it definitely hurts. I had one fall on my head while cleaning out my gutters and I wobbled almost falling off my ladder.
Check out my post explaining whether or not you should pitch a tent under a tree.
4. Take Special Precautions With Thunder and Lightning
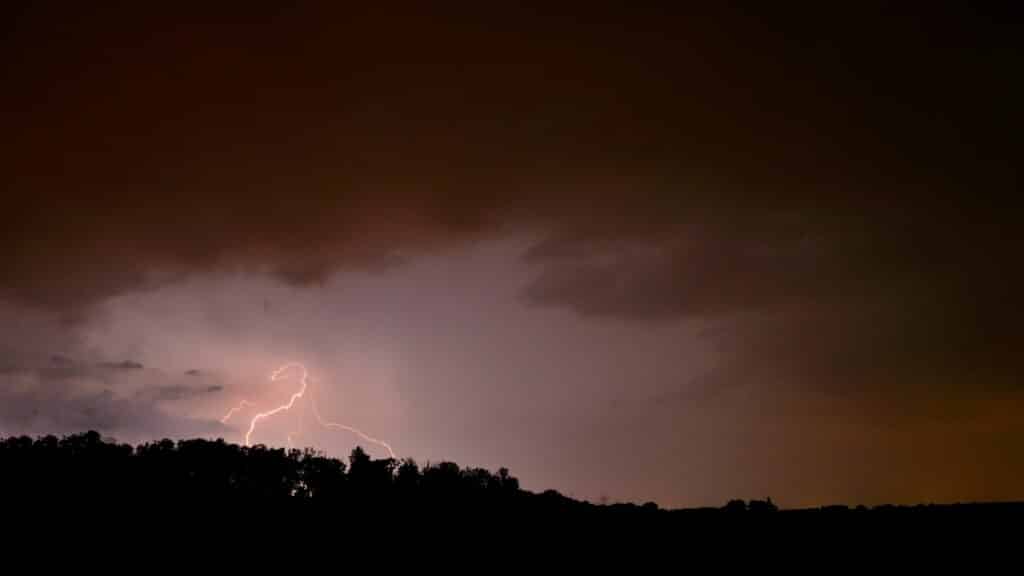
We’ve all been trained that it’s dangerous to stand under a tree during a thunderstorm, but that’s misleading. It’s only dangerous when you set up a tent under a single tree or on the edge of a forest. Going deep into a forest during a lightning storm actually reduces your chance of getting struck by lightning.
Lightning usually hits the tallest object it can find, but there’s no designated high spot in a forest. It’s kind of like you’ve moved the ground up 100 feet. The forest canopy is one giant mass of similar height trees so as you go deep inside a densely grown forest the risk of getting struck by lightning isn’t higher than in other places.
Check out my post explaining why tents are safe in a thunderstorm.
5. Pick An Elevated Campsite With Proper Drainage
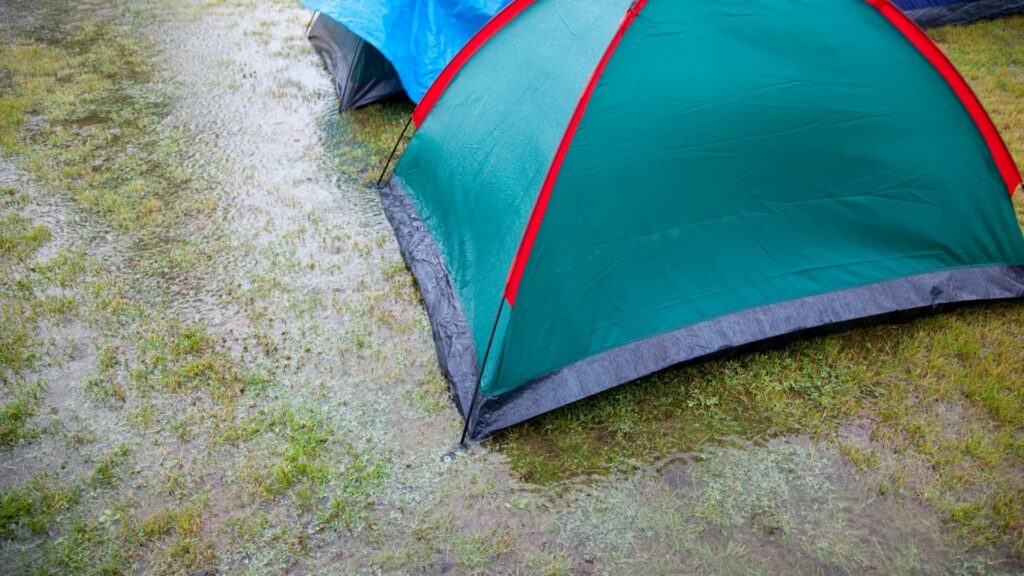
You need to take extra precautions when picking the perfect spot to set up a tent in the rain. There are 3 key things you need to consider. Check for low spots, consider the flow of water, and try to find a spot with good drainage.
- Don’t Pitch A Tent In Low Spots: Look at the lay of the land and try to avoid low spots when there’s any chance of rain. Water always collects at the lowest point so that’s a terrible place to set up camp. Most tents have waterproof bathtub floors (unless it’s floorless), but you wouldn’t want to hang out in a mud pit all weekend.
- Try To Predict The Flow Of Water: Check the soil and try to figure out the flow of water. Water always flows down to the lowest point so try to visualize where the rain water will flow. You can usually spot signs of flowing water: piles of loose debris, paths of soil erosion, or moss, fungus and other plants that prefer wet environments.
- Consider The Soil Drainage: Finding a spot with good soil drainage can be a challenge. Rain obviously can’t drain through rocks, but it also has a hard time penetrating clay filled soil. You can check the soil consistency by pushing a tent stake into the ground. If the stake pushes and pulls out easily/clean it’s sandy well draining soil. When it feels like you’re pushing through muck that’s clay filled soil that will cause drainage issues.
That might seem complicated, but you’ll quickly learn how to spot well draining campsites. I start off by looking for small hills, but if that’s not possible I look for flat soil where there isn’t low spots or higher ground leading to the site. Test the soil to see what it’s made out of and you should be good to go.
6. Work On Keeping The Inside Of Your Tent Dry and Practice Before You Go Out
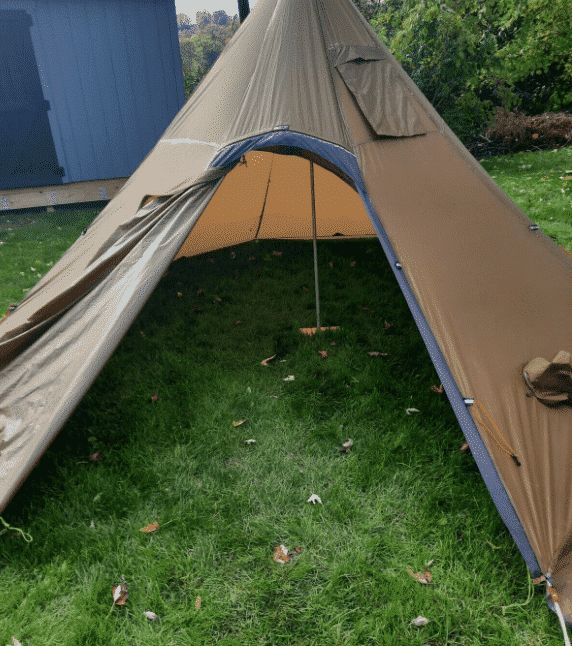
Single wall tents are entirely waterproof once you zip up the windows and doors so this section only applies to double wall tents. If your tent has a mesh roof/walls, that means it’s a double wall tent. Setting up a double wall tent in the rain can lead to water problems, but I’ll go over a few tips to reduce the risk.
With most double wall tents you need to set up the inner mesh tent first and then set up the waterproof rainfly. This can lead to water soaking the mesh ceiling and draining into the tent soaking the floor and sidewalls. Nobody wants to sleep on a soaking wet floor and the wet ceiling can cause condensation issues (plus the drip factor).
- Set Up A Tarp Over The Tent: I explained this step above (click here to jump to that section), but it’s extremely important so I’ll repeat myself. You should seriously consider using a tarp (my favorite) to set up a sheltered area to set your tent under.
- Separate Each Part Of Your Tent: Usually I’m lazy and roll my tent into a big ball that I jam into my stuff sack. That’s a terrible idea if you’re trying to set up a tent in the rain. Keep your poles, main tent, and rain fly separate so you can pull out one piece at a time. Take each part out separately to reduce the time your tent will be exposed to rain.
- Keep The Door Zipped: Trying to close a door on a crumpled up tent is a challenge, so make a habit of always closing the door on your tent when you pack it up. You don’t want water going in through the open door while pitching the tent.
- Keep The Top Of Your Rain Fly Up: Make sure the top of your rainfly is the only part exposed to the rain. You don’t want the inside of your rainfly to get wet. It will take forever to dry, drip down into your tent, and cause condensation problems.
- Knock Water Off The Mesh On Your Tent: The mesh on your tents roof should be somewhat waterproof, but it will eventually leak so you need to knock/towel off most of the water. Shake your roof, wipe it with a towel, and then put on the rainfly.
- Wipe Down Your Tent With A Towel: I always carry 2-3 microfiber camp towels to use around camp. You will definitely need a towel to wipe down your tent’s floor, ceiling, and walls. A little bit of rain will always get inside when setting up a tent in the rain. Even if you avoid it at the beginning you will eventually walk through the tent with wet shoes, clothes, or gear. This will almost always lead to condensation issues since it’s so humid during a rainstorm.
- Practice Setting Up The Tent Before Your Trip: I’ve been camping for decades and the first time I setup a tent it usually takes 20-30 minutes to figure everything out. After I figure out where everything goes it takes less than 10 minutes to pitch the same tent. Now I can pitch my tent and get my rainfly up in 5 minutes when I’m rushing in the rain.
7. Test Your Tent For Leaks Before The Trip

This is rarely an issue with brand new tents, but make sure you test your tent for leaks before the trip. Spray your rainfly, the seams, and bottom of your tent with a hose. Check inside the tent for leaks and
I usually apply a DWR spray to the outside of my tent at the beginning of each camping season and check all the seams for leaks. I like Nikwax DWR Spray, because it cleans the tent and adds UV protection, but Kiwi Camp Dry is a cheaper option if you just want waterproofing.
Dealing with leaking tent seams is much harder, but it’s still not that bad. Don’t waste your money on dedicated tent seam sealers like Gear Aid Seam Grip. It’s just a tiny overpriced tube of silicone caulk and it would take multiple tubes to do an entire tent.
I go through all the different options you can choose from in my tent seam sealer alternative post, but Shoe Goo is probably your best bet. A tube of Shoe Goo is exactly the same thing as “real” tent seam sealers, twice the size, and much cheaper. Silicone based products are a gunky/globby mess to apply so I like to thin it with mineral spirits.
Check out my post that explains how to thin tent seam sealer and how to make homemade seam sealer for more info.
My how to make homemade seam sealer post explains making large batches of tent seam sealer out of 100% silicone window caulk. That’s by far the cheapest option if you want to redo the seams on your entire tent. Silicone window caulk costs like $5 at Home Depot and you can do multiple tents plus all your gear with one tube.
8. Learn How To Properly Use A Tent Footprint or Ground Cloth
Most people are under the false impression that tent footprints keep water out of your tent. It may help if there’s a hole in your tent floor, but that’s not the primary purpose. Your tent footprint protects the floor from punctures and keeps mud off the bottom of your tent.
It shouldn’t be hard to figure out why you would want to keep mud off your tent. Cleaning off the bottom of a tent is a serious pain. You have to set up the tent, flip it over on it’s side, and scrub the heck out of it. Then you need to leave the tent up for 24 hours to dry in the sun.
Washing off the bottom of a tent footprint is much easier. I normally use a low power pressure washer to clean off my tent footprint. I’m not worried about damaging a $20 footprint, but I would never consider use a pressure washer on my tent ($200+). Just lay out the footprint, spray it off, and give it a few hours to dry.
You can use a tarp as a tent footprint, but real footprints are reasonably priced. Sorry for sounding like a Redcamp salesman, but they also sell high quality reasonably priced ultralight tent footprints. Just make sure you choose a model that’s a few inches smaller than outside edges of your tent (doesn’t have to be perfect).
Make Sure Your Footprint Is Completely Under The Tent
I would say 50 percent of people don’t know how to properly use a tent footprint. Think about how tents are designed. They have a curved roof that drains water to the outside edge of your tent. What will happen to all that water if your footprint hangs past the edge of your tent?
It will pool up around the edge of your tent, which can lead to condensation issues and leaks if you have damaged seams or poor waterproofing. Set up the footprint so it’s 2-3 inches inside the outside edge of your tent. The footprint should never extend past the edge of your tent.
9. Consider Using A Single Wall Tent In Mild Weather
I have a love/hate relationship with single wall tents. Single wall tents are easier to setup, completely waterproof when setting up a tent in the rain, and much cheaper, but they have one glaring problem. Single wall tents are horrible when it comes to ventilation!
That’s not a problem when you’re camping in mild 60°-70°F weather, but it can cause serious condensation issues in hot weather. Your tent will be completely waterproof while setting it up with the windows and doors closed, but you’re left with a poorly ventilated sealed off tent.
When you’re inside the tent, you need to keep the doors and windows closed to keep out rain. You can try your darndest to eliminate outside moisture, but there’s no way to completely get rid of condensation in a single wall tent. I’ll go over dealing with condensation in more detail below.
10. Look Into Fast Pitch, Floorless, and Exterior Pole Tents
The vast majority of people should choose double wall tents, but there are other options that work well in the rain. You can also use a fast pitch, floorless, or exterior pole tent. There are a handful of problems with each design, but they make it easy to set up a tent in the rain.
- Fast Pitch and Quick Pitch Tents: As the name implies, you can put up a fast pitch tent in a few minutes. Most quick/fast pitch tents are regular double walls (like the MSR Hubba Hubba NX) that you can use without the inner body. It’s basically just a rainfly that drapes over tent poles. There’s no floor, door (bad with insects), or inner mesh section to deal with so you don’t have to worry about rain getting inside your tent. Lay down a tent footprint inside your tent and you’re good to go.
- Floorless Tents: Floorless tents are similar to Fast Pitch and Quick pitch options, but they take longer to setup. There’s less support poles to cut down weight, but that means you need to run out extra guy lines. You can still keep out exterior rain, but it will take longer to set up the tent.
- Exterior Pole Tents: Exterior pole tents are double walls with inside of the tent attached to the rainfly. So the inside of your tent doesn’t get exposed to rain and it speeds up the set up process. Just pop in the exterior poles and lift up the tent into position.
You may want to check out my post explaining how to keep floorless tents dry.
11. Keep Your Gear Dry and Leave Wet Gear In A Dry Spot Outside
You can’t bring wet gear inside your tent! So try to make sure most of your gear stays dry so you don’t have to store it outside. Keep gear in dry bags and use both a rain cover and pack liner inside your backpack. The rain cover keeps the outside of your pack dry, but water will leak through the shoulder straps and down through the back pad.
I usually use an Osprey Ultralight Packliner, but there’s a cheaper option. You can use a 18 gallon trash compactor bag (like these) to line the inside of your pack. Trash compactor bags are puncture proof so they should last multiple weeks in your pack. You can also spot fix punctures with a piece of duct tape.
Check out my post explaining how to dry wet camping clothes and gear.
If you do end up with wet gear, you will need to hang it up to dry outside your tent. This is one of the main reasons why I recommend setting up a tarp over your tent. It gives you a convenient spot to keep your wet gear out of the rain to dry.
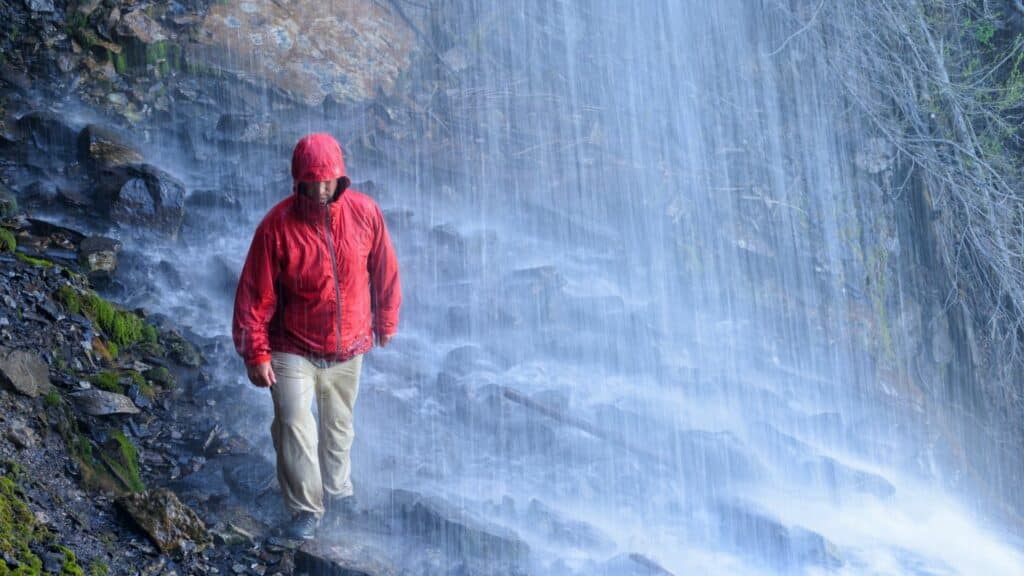
12. Use Rain Gear and Water Resistant Shoes or Boots

Make sure you buy a set of well-ventilated rain gear. Look for raingear with jacket pit zips or large mesh ventilation panels. You will end up with excessive sweat and condensation forming on the inside of your jacket if there’s poor ventilation. I really like my Columbia EvaPouration Jacket, but I’m sure there are cheaper options available.
The only time you would need rain pants is when it’s seriously pouring outside. Your upper body blocks 90% of rain and moisture-wicking hiking pants will dry fast. I do keep a pair of cheap Frogg Toggs in my pack, but I only put them on when it’s seriously storming.
You also need to find a way to keep your shoes and socks dry. Personally, I hate 100% waterproof hiking boots/shoes, because they lead to excessive sweating. I recommend using a pair of water-resistant boots which are good enough in 99% of situations. Pair them with a pair of merino wool socks that feel even when they get damp and you’re good to go.
I also carry a pair of cheap rubber sandals to wear around camp when it’s raining. They’re comfortable for hanging out, they dry fast, and you can wipe off 90% of the water if they get wet.
13. Consider Condensation Issues Before Setting Up Camp
There are two primary causes of condensation: poor ventilation and interior moisture. Go with a double wall tent with a mesh ceiling/walls to help with ventilation. Try to keep your door open when possible, pull your rainfly out some, and consider using a small fan in the tent if possible.
Eliminating interior moisture is easier said than done. Use towels and a sponge to dry off the floor, walls, and ceiling of your tent, and keep wet gear outside. Hang your wet gear under your tarp to dry or try to position it under your vestibule if you don’t have a tarp.
Unfortunately, there’s no way to completely eliminate interior moisture. You breathe out water vapor with every breath you take, and sweat 2 liters of water per night. That’s a lot of water going inside your tent so you definitely need to get ventilation problems under control.
Check Out my camping in the rain ultimate guide for more tips. It goes over every other thing you need to know about camping in the rain.


