Camping in 40 degree weather can be a serious challenge. You don’t have to deal with the problems that come with freezing temperatures, but staying warm can be a serious challenge. Everything you do will be a little bit harder! You’ll be cold and miserable if you don’t have the right sleep system and haven’t figured out how to layer clothing.
How do you camp in 40 degree weather? Start off by getting your cold weather sleep system figured out, work on preventing condensation, and learn how to layer your clothing for warmth. You don’t have to be cold with the right gear. Everything else will be similar to camping in warmer weather.
In the rest of this post I’ll explain all the gear you need to camp in 40 degree weather. This guide focuses entirely on the gear you’ll need. So I won’t go over some of the obvious things like building a campfire and cold weather foods if that’s what you’re looking for.
Table Of Contents
Camping In 40 Degree Weather Without Getting Cold
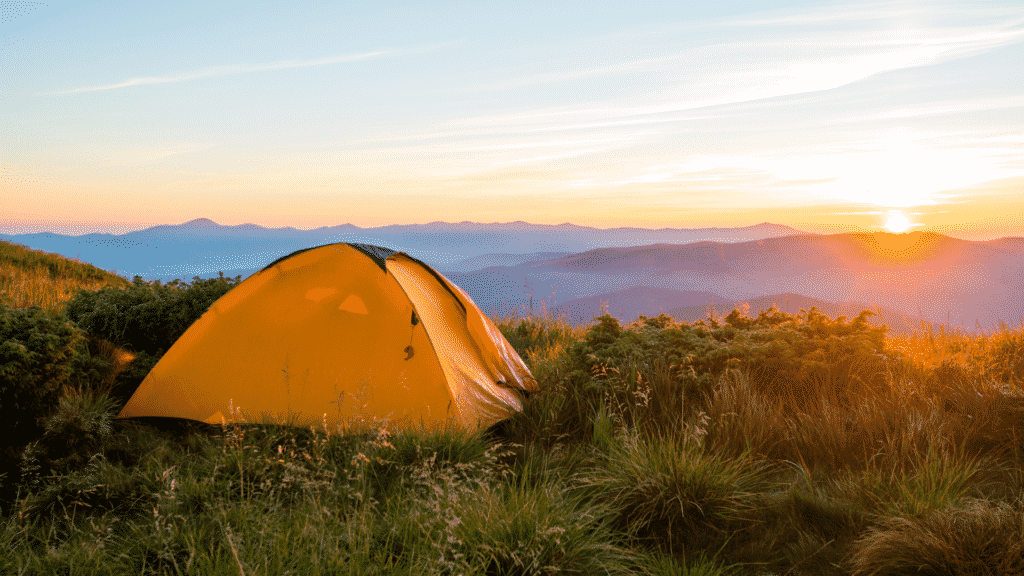
Most people can handle camping in 40 degree weather. You just need to buy cold weather gear and figure out how to layer clothing for warmth. There’s no risk of snow or freezing water so it should be similar to camping in warmer weather once you figure out how to stay warm.
Just understand that there’s a big difference between 40° daytime temperatures and 40°s at night. If the temperature is 40° during the day it will probably drop into the 20°s at night. Make sure your sleep system is warm enough for the nighttime lows.
Camping in 40 degree weather isn’t ideal, but it’s not that bad. It’s cold enough to be miserable if you screw up your sleep system and clothing, but warm enough that you’re not risking hypothermia (unless you’re wet). You shouldn’t have any problem with the right cold weather gear.
Just make sure you pack extra layers of clothing to make up for any problems with your sleep system. It’s also when you need to start focusing on layering clothing, which I’ll explain in detail below.
I’m just warning you that this is a long guide. So you may went to click on the links in the following list to jump to sections you’re interested in. Here’s everything you need to camp in cold weather.
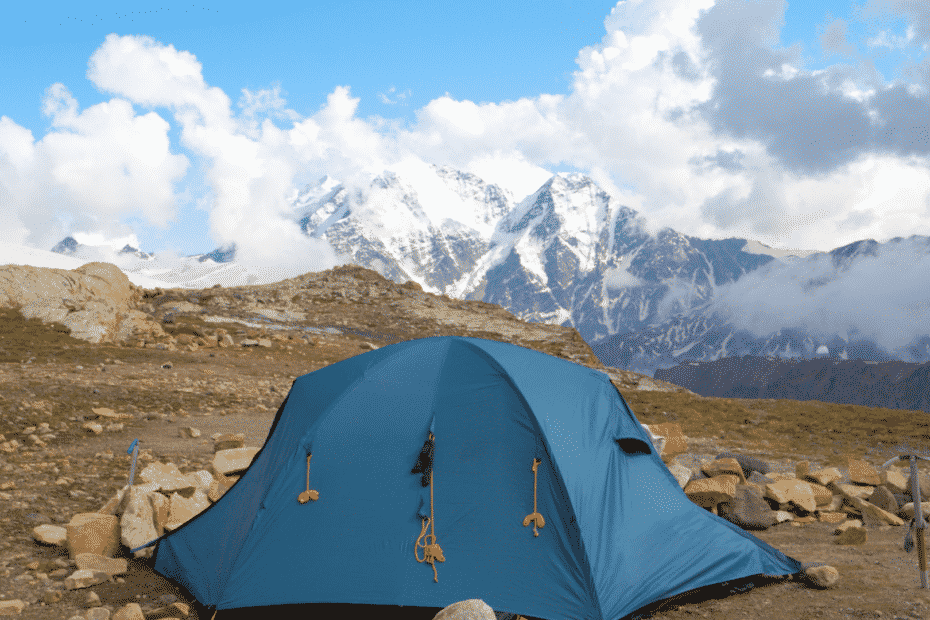
- Any 3-Season tent will work since you don’t have to worry about snow. Just make sure the tent has extra ventilation so you won’t run into condensation issues.
- Choose a sleeping bag that’s 15 degrees warmer than your expected night time temperatures (20° rating). You can use a high quality sleeping bag liner to use your warm weather bag in cold weather.
- Use a cold weather sleeping pad to insulate your body from the cold ground.
- Learn how to layer clothing to stay warm on 40 degree days/nights. You need to have a quick-dry base layer, warm insulating layer, and waterproof shell layer.\
1. Any Well Ventilated 3-Season Tent Will Work In 40 Degree Weather
Almost any tent will work since you won’t have to deal with snow load. Your body heat will cause serious condensation issues if you try to cheap out on the tent. Go with a well ventilated 3-Season tent in the $150-$200 price range. Tents are deceptive about their person ratings so get a tent that’s one person higher than your intended use (3 person tent for 2 people).
Just make sure your tent has well ventilated sidewalls, because condensation is a major issue in cold weather. Wind/cold will force you to close windows and doors so there won’t be enough ventilation in cheap tents. A tents rainfly blocks wind and rain so look for a tent with large mesh side walls.
Alps Mountaineering and REI-Coop offer the best value in the budget price range. The Alps Mountaineering Chaos 3 Person Tent (7lb 5oz) and 2 Person Tents (5lb 12oz) are a great choice. REI-Coops Passage 2 Person Tent is another option if you’re a solo camper.
Once you get above the $200 price range there are a wide variety of options. These tents will usually be 3-4 pounds lighter if you’re trying to reduce your trail weight. Aim for under 5 pounds for a traditional solo backpacking tent (lightweight 3-4lbs and ultralight 1-2lbs).
Know How To Deal With Condensation
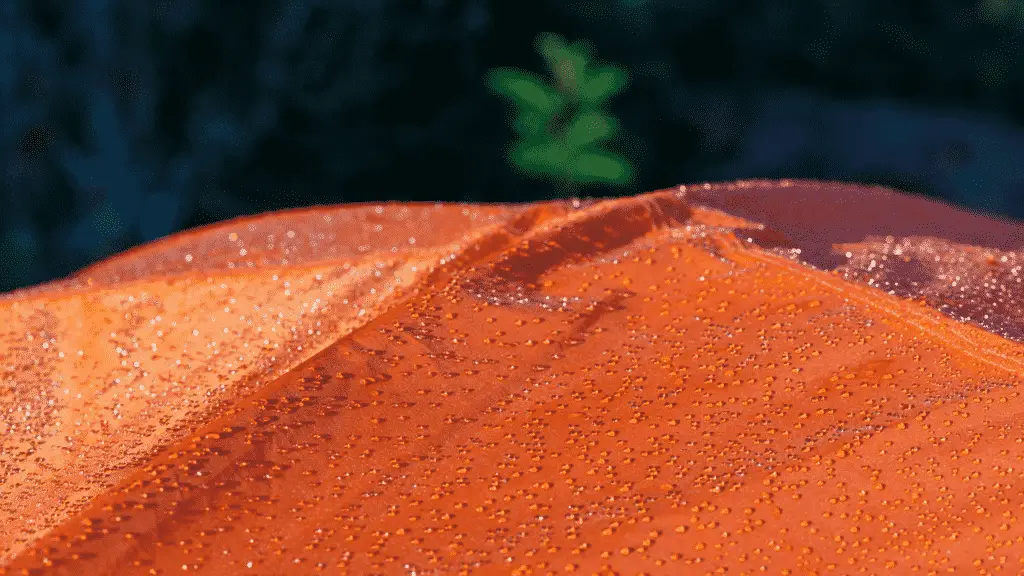
Most people don’t think about condensation when choosing their tent. That might not be a problem in 60°+ temps when you can open up doors/windows, but it’s a huge issue in cold weather. Make sure your tent has lots of ventilation so heat can escape.
That sounds like a problem, but tents aren’t designed to keep you warm. Tents are used to keep out rain, wind, and snow (not trap warmth). It’s only about 5° warmer inside a tent, so most of your warmth comes from your sleep system and clothing.
Condensation occurs when warm air collides with cold surfaces or when there’s too much moisture in the air. Increasing the ventilation will let out moisture and keep the temperature inside your tent closer to the outside air.
Removing wet gear will help reduce condensation, but there’s no way to completely eliminate moisture inside a tent. We’re constantly sweating to regulate body temperature and releasing water vapor with every breath we take.
You need to find a tent with lots of ventilation so the moisture/heat can escape. Opening up your doors/windows lets in wind so the sidewalls need to let water escape. Look for a tent with mesh sidewalls/roof to improve ventilation. The rainfly blocks wind and rain so mesh walls are almost always a good thing.
2. Use a 20 Degree Sleeping Bag On 40 Degree Nights
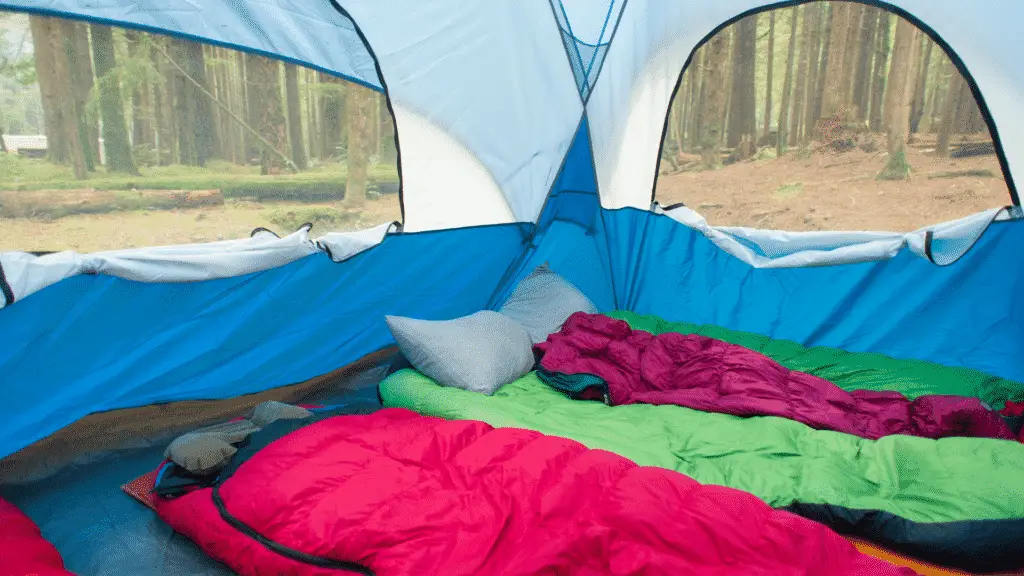
You can’t use a warm weather sleeping bag in the cold. It will be ridiculously cold! Temperature ratings are deceptive so even a 40° sleeping bag won’t be warm enough. Temperature ratings state the minimum temperature that you can survive without being in danger. You need to look at the comfort rating that’s 12°-15° warmer than the advertised temperature.
Buy a sleeping bag with a temperature rating that’s 15° colder than the expected nighttime lows. You can get buy with a 30-40 degree bag if you use a sleeping bag liner, but you’re talking about a $20-$30 price difference so it’s not worth it. I still recommend buying a sleeping bag liner since they protect your bag and allow you to use a warm weather bag in the cold weather (I’ll explain below).
It doesn’t matter if you choose a down or synthetic sleeping bag, when it comes to temperature. Down bags will be lighter and pack smaller, but two bags with the same temperature ratings offer similar warmth.
I highly recommend looking at used sleeping bags on eBay. Most people buy a 20 degree bag thinking they’ll get into winter camping, go once or twice, and never go again. You can get great deals on lightweight 20° down bags for 1/3 of the retail price.
Sleeping Bag Liners Add Warmth To Your Sleeping Bag
Sleeping bag liners serve two main purposes. They protect your bag from sweat, dirt, body oils etc., allowing you to go longer between wash cycles, and they also increase the temperature rating in your sleeping bag. A quality liner can add 25°+ to your bags temperature rating, but even cheap liners will help.
I use a Sea To Summit Thermolite Sleeping Bag Liner with all my bags. It adds 25° to my bags temperature rating and can be used on its own in the summer (60°F or warmer). When you pair it with a 40° sleeping bag you can use the same gear from 30°F nights all the way into the summer. Use it by itself in the summer, and pair it with the sleeping bag in colder weather.
Even a cheap Coleman Sleeping Bag Liner will add 12° to a sleeping bags temperature rating. You really can’t beat the price and it adds a lot of versatility to your bag. Plus you can go longer between wash cycles which will help extend the life of your bag. Every time you wash a sleeping bag the insulation will be less effective.
3. Sleeping Pad: Use A 4+ R-Value Sleeping Pad
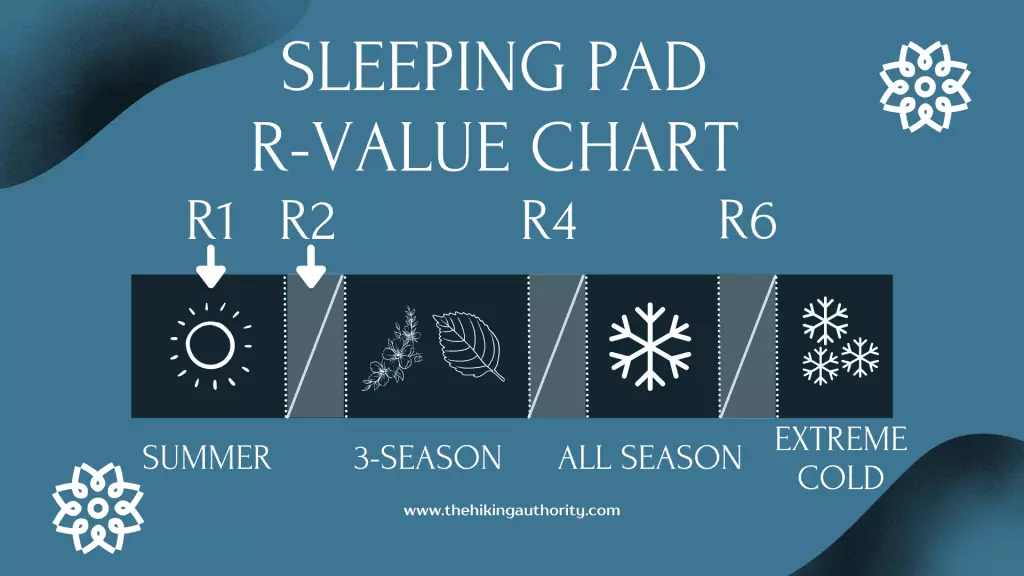
You need to have 4+ R-Value inflatable or self inflating sleeping pad on 40 degree nights. This is by far the most popular R-Value range for sleeping pads. There’s at least 60-100 different models to choose from. So pick a pad that fits your budget, body size, and trail weight preferences.
Sleeping pads can be ridiculously expensive once you start looking into ultralight and lightweight models. You’ll be spending a minimum of $80 and up to $200 if you need an ultralight pad. So you’re paying $100 to shave 1/2 to 1 lb off of your trail weight.
Personally, I don’t think it’s worth the extra money unless you’re trying to drop into the ultralight/lightweight community. Once you start going that route it’s like being in a completely different hobby (weightlifting vs crossfit).
- Budget Inflatables (Lightweight): Big Agnes Insulated Air Core (4.5 R-Value) is by far the best budget inflatable pad on the market. It’s reasonably priced, ultralight, and comes in wide and long body styles.
- Ultralight Inflatables: Thermarest NeoAir Xlite (4.2 R-Value) is the lightest 4+ R-Value sleeping pad on the market. It’s expensive, but it’s the only option that I can think of that comes in at less than 1lb.
- Budget Self-Inflating: There are lots of budget self-inflating pads in the 4+ R-Value Range. Sea to Summit Camp (4.2 R-Value) and REI-Coop Trailbreak are affordable options.
- Ultralight Self-Inflating: Thermarest Trail Pro is one of the only 4+ R-Value ultralight self-inflating sleeping pads. The regular version comes in at 1lb 13oz, but the large and wide pads are just over 2lbs.
4. Clothing: How To Layer Clothing In 40 Degree Weather
In 40 degree weather you need to start figuring out your layering system. You need to wear a breathable moisture-wicking baselayer, insulating middle layer, and exterior shell for wind and rain. I’ll explain more below, but I also go over it in my backpacking clothes and sleeping bag clothes guide.
How To Layer Clothing: Camping In 40 Degree Weather
- Base Layer (Underwear Layer): Choose a warm base layer that wicks moisture away from your body. Merino wool is by far the best option, but synthetic base layers also work.
- Middle Layer (Insulating Layer): The middle layer is what provides 90% of the warmth. Go with either a down or synthetic middle layer. It needs to be warm enough to wear on its own without the outer shell layer. I usually wear a lightweight down puffer style jacket.
- Outer Layer (Shell Layer): The outer shell layer adds a little bit of insulation, but it’s main job is to protect you from the wind and rain. Make sure your outer layer is waterproof/water-resistant and breathable. I prefer a hood on my outer shell layer.
Base Layer: Warm Lightweight Quick-Dry Fabrics
The key to staying comfortable in cold weather is to wear an insulated moisture wicking base layer. Long sleeve merino wool shirts and long johns are by far the best option. They’re warm and wool is by far the best fabric material for dealing with sweat and water.
I prefer Smartwool base layers, because they’re extremely durable (they are expensive). Merino.tech baselayers, and Meriwool are cheaper options. I buy most of my merino wool baselayers at Goodwill so I can save a few bucks. There’s always a handful of high quality used merino wool sweaters in the $5-$10 range.
Middle Layer: Warm Insulating Layer Doesn’t Need To Be Waterproof
A fleece jacket is usually warm enough as your insulating mid layer in 40° weather. The only time you would have a problem is in windy weather. You can toss on your outer shell layer, but you may want to go with a down or synthetic puffer jacket (I think that’s what they’re called). The ones that snowboarders and skiers wear under their outer shell.
I usually wear a down puffer jacket with a lightweight fleece jacket over it. The down jacket is used to block wind and the fleece jacket is moisture-resistant for light rain. Synthetic/down insulation absorbs water fast so be careful in the rain.
Outer Shell Layer: Waterproof/Windproof Outer Jacket
Outer shells provide some warmth, but that’s not their main purpose. The shell layers sole purpose is to keep your insulating layer dry and block wind. You shouldn’t have to wear your outer shell jacket most of the time.
The only time you need it is on windy and rainy days. Any midweight waterproof outer shell will work on 40-50 degree days. Just make sure the jacket has a hood so you don’t soak your insulating layer if it rains.
I wear a light breathable water-resistant Columbia jacket that I’ve had since I was a teenager. It’s not entirely waterproof, but I’ve never had any issues. I carry a cheap poncho just in case, but I’ve only needed it a handful of times.


