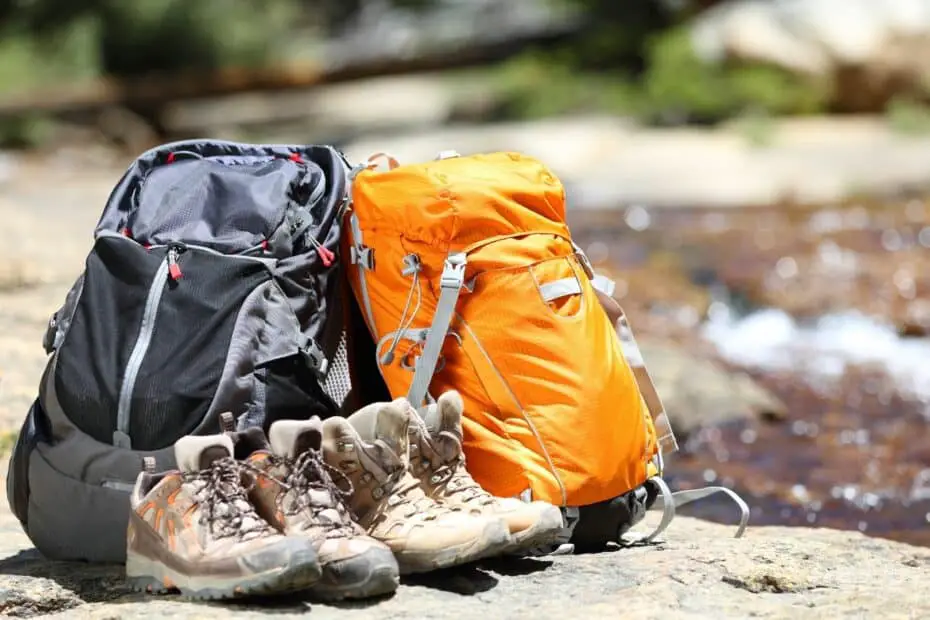
There isn’t much to explain about a basic backpack. You have one large pocket that you fill with gear, pockets on the front/side, zippers to close it up, and shoulder straps to put your arms through. On the other hand, backpacks for hiking, camping, and backpacking are much more complex.
There are lots of components that serve very important functions, but others are kind of pointless. That’s why it’s important to know all of the different parts of a backpack so you know what you’re buying.
Table Of Contents
Anatomy Of A Backpack: Backpack Parts Explained
Understanding the anatomy of a backpack will serve as a useful starting point when searching for a new pack. You need to know which features of your pack are important and which features you can leave off.
Unfortunately, I can’t give a one size fits all recommendation for everybody. It depends on the gear you use, pack size you need, and type/length of backpacking or camping trip you’re going on. You won’t need as many features on a daypack as you will for a multi-day high capacity pack.
So lets start getting into the main parts of a hiking backpack. This is a long post so I decided to break it into 4 main categories to make things easier. You can click on each of these category links to jump down to the relevant section.
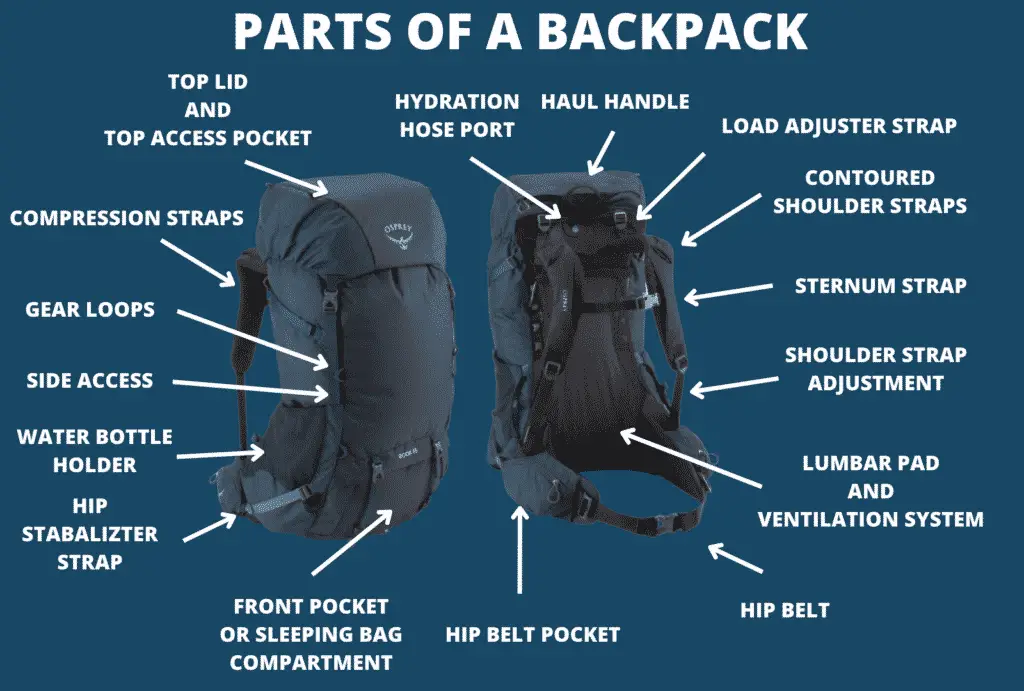
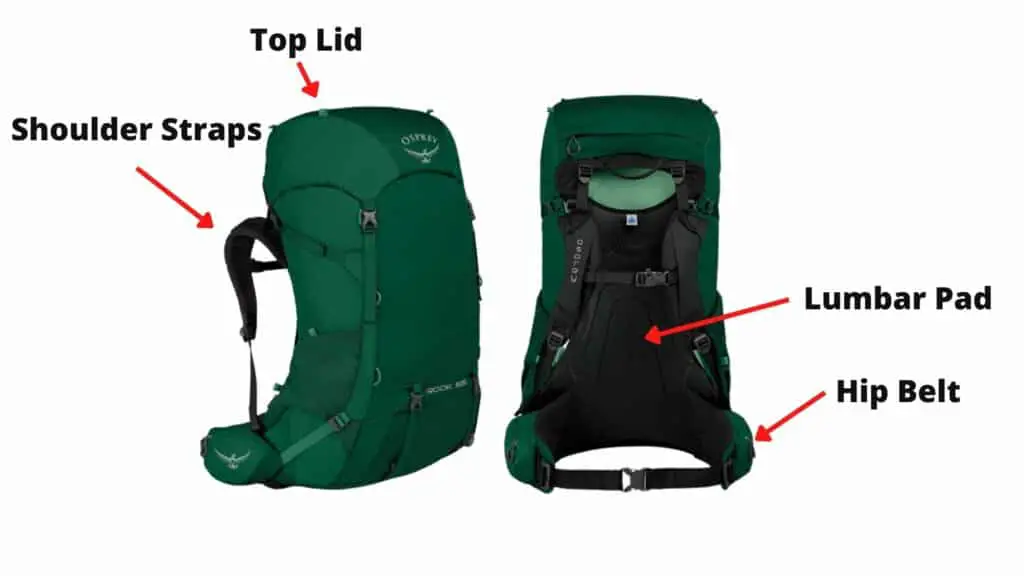
- Main Backpack Body: The main backpack body consists of 5 parts: frame, shoulder straps, hip belt, top lid, and lumbar pad. This is part of your pack that provides structure to your pack.
- Adjustment Straps: Learn what each adjustment strap on your pack does and how to adjust them for a perfect fit.
- Pockets and Compartments: Every pack has different pockets and compartments covering the outside of the pack.
- Gear Attachment and Accessories: This section covers all of the gear attachment points and accessories that you can get with your pack.
Before we dive into each backpack feature, lets ask a few simple questions. These questions should help narrow down the type of pack you need.
- Do you hike with trekking poles, ice axe, or plan on carrying a foam sleeping pad or bear canister outside your pack?
- Do you use a hydration bladder or water bottles?
- How often do you snack on the trail or need to access exterior pockets?
- Are you an ultralight/lightweight minimalist hiker? Or would you prefer a heavier pack with lots of pockets for storage?
- How are you with organization? Do you want a compartmentalized pack or would you prefer one large pocket?
- How do you feel about gear strapped to the outside of your pack?
1) Parts Of A Backpack: Main Body
● Frame- Internal, Frameless, External
In the old days, almost every pack used an external frame, but those days are mostly behind us. Most companies have switched to lightweight internal frames or frameless ultralight styles.
Internal frames will be far more comfortable, so that’s what I recommend for the vast majority of people. The only time you should go with a frameless pack is if you’re trying to get into the ultralight/lightweight backpacking hobby.
- Internal Frame Pack: An internal backpack frame saves weight, holds the load close to your body, spreads out the weight, and gives your pack structure. The vast majority of hiking backpacks sold today use an internal frame.
- Ultralight Frameless Pack: Some ultralight packs use a frameless design to save weight. Removing the internal frame cuts down weight, but you lose structure and support in your pack.
- External Frame Pack: There are still a handful of companies that make external frame packs, but you rarely see them in the camping and backpacking communities. External frame packs have a large boxish metal frame on the outside of the pack. External frames are mostly used by hunters since they have to strap rifles or bows and lots of gear to the outside of their pack.
● Contoured Shoulder Straps
These are the straps that go over your shoulder to connect the pack to your body. Your shoulder straps should be sturdy with lots of padding. Pay close attention to your shoulder straps.
Avoid any pack that doesn’t properly fit your shoulders or have lots of padding. It won’t take long for the straps to dig into your shoulders causing serious chafing issues and shoulder pain.
● Hip Belt
The hip belt helps pull the pack load off of your shoulders. A quality hip belt will position 80% of the load across your torso and down into your legs. It’s by far the most important suspension device in your pack.
So make sure you spend the extra money on a comfortable hip belt and take the time to tighten it up. The key is to tighten the hip belt so that it’s tight without constricting movement. It should feel just like the belt you where on your pants when properly adjusted.
● Top Lid
The top lid serves 2 purposes. It keeps rain out of the top of your pack by diverting water around the sides and compresses the top of your pack so the weights closer to your torso. Make sure you tighten down the straps to get the most out of your top lid.
● Lumbar Pad (aka Back Panel) and Ventilation System
The lumbar pad (aka back panel) is the padded section that rests on your back. Lumbar pads should be comfortable, supportive and breathable. Some back panels are highly padded, while others are bouncy mesh systems that pull the pack off your back.
Both styles have their benefits, but they also have weakness. Highly padded back panels will soak up rain and absorb sweat leading to a drenched back. Bouncy trampoline-like back panels offer more ventilation, but they’re far less comfortable.
2) Parts Of A Backpack: Adjustment Straps
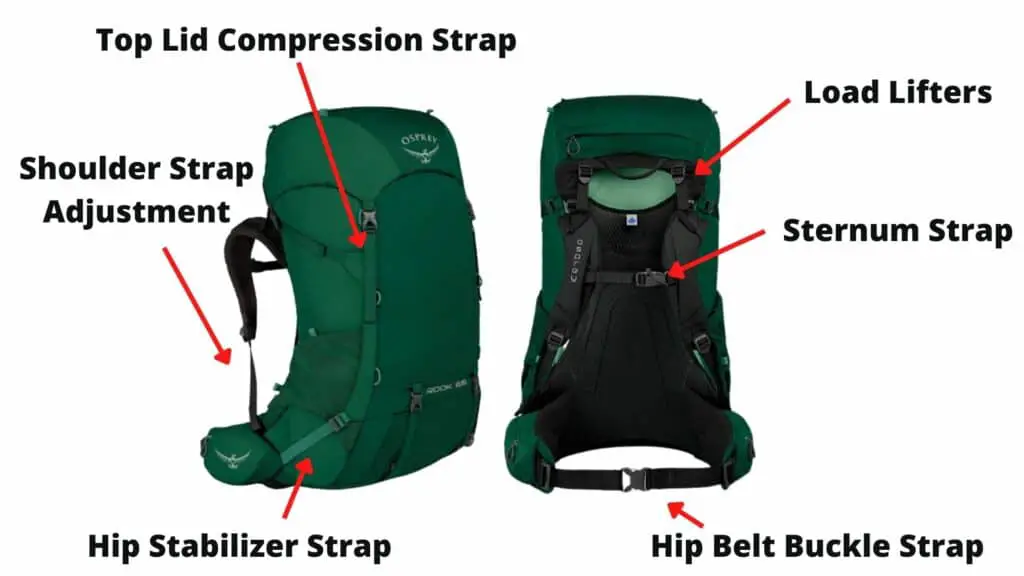
● Top Lid Compression Strap
The top lid compression strap can be adjusted to compress a partially empty pack down on itself. This centers the pack load closer to your bodies center of gravity. You can loosen up this top strap to store extra gear between the top of your pack and top lid. This is a great place to store a foam sleeping pad or bear bear canister.
● Adjustable Load Lifters (aka Load Adjuster Strap)
Load lifters are found at the top of the shoulder straps and can be adjusted to shift the load on your back. These are the straps that sit at the top of your shoulder straps and connect to the top of your pack.
They pull the weight of your pack towards your torso and closer to the bodies center of gravity. So instead of the top of pack pulling away from your body, it gets pulled into your shoulders.
Load lifters aren’t necessary on lower capacity day packs since the load is already centered on your torso. It seems like 40 liters is the cutoff where you start finding load lifters, but whether or not they’re included depends on the pack. They’re often left off ultralight packs to cut a few oz off the pack weight.
● Sternum Strap
The sternum strap pulls your shoulder straps into the center of your body. Sternum straps can be tightened or loosened across your chest, and usually are adjustable vertically along the shoulder strap.
The buckle may even have a whistle that can be used in an emergency. Whether or not the whistle is necessary is up for debate. It’s usually an afterthought and not very loud, but it can be helpful if you lose your voice in an emergency.
Check out my post explaining why backpacks have buckle whistles for more info.
● Hip Stabilizer Straps
The Hip belt stabilizer strap connects your hip belt to the main part of your backpack. Not every pack will have an adjustable stabilizer strap, but they are nice. Every little adjustment on a pack can make a huge difference.
● Shoulder Strap Adjustment
These are the adjustable straps that attach to the bottom of your shoulder straps. The shoulder strap adjusters keep your shoulder straps in place and correctly positioned on your body. If they’re too tight the straps will dig into your shoulders, but too loose will allow the load to shift as you walk.
Remember to adjust the shoulder strap adjustment at the beginning of each day. As you hike the pack load will settle and pull on the straps.
● Compression Straps
Compression straps are by far the least used straps on most peoples pack. They’re extremely useful, but people rarely take the time to adjust the straps. These compression packs pull the pack load closer to your body reducing the weight pulling on your lumbar region.
Compression straps help give your pack shape and balance the load. You don’t want an out of shape pack that’s shifting as you walk. It will pull you off balance and increase the workload as you hike.
● Hip Belt Buckle Strap
The hip belt buckle should be self explanatory. Shorten the hip belt strap to tighten it up and lengthen it for more breathing room. A quality backpack transfers the weight of your pack into your hips/legs so it needs to be tight without causing chafing/rubbing issues.
3) Parts Of A Backpack: Pockets and Compartments
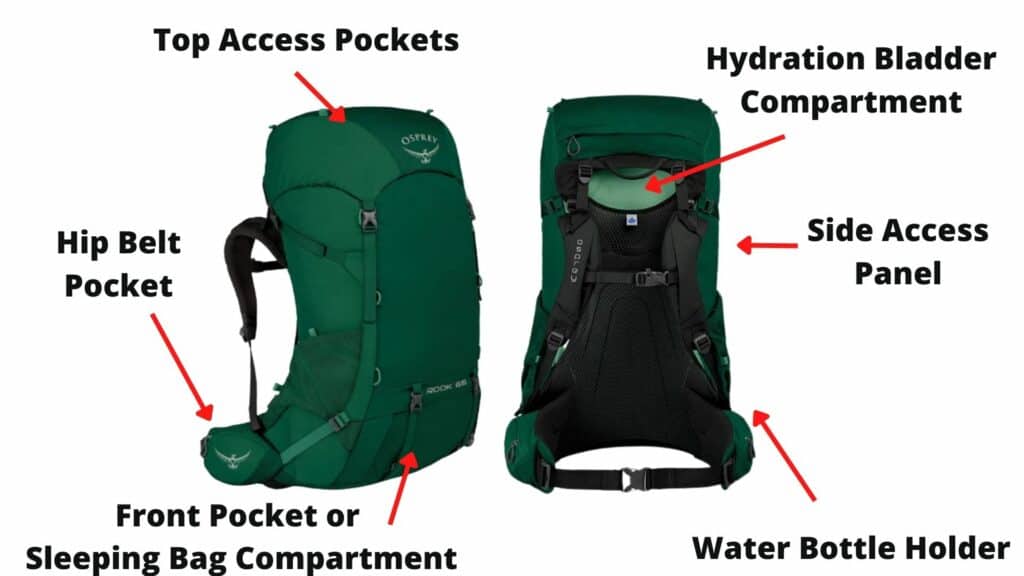
● Front Pockets and Kangaroo Pockets
A zippered front pocket is easy to access without going into the main compartment on your pack. There’s usually one pocket on the bottom of the pack, but it could be located in the center if there’s a sleeping bag compartment.
A kangaroo pocket is a large open pocket on the front of your pack. There’s no zipper to close the kangaroo pocket. So it’s perfect for storing long bulky gear that’s hard to fit inside your pack. There isn’t a kangaroo pocket on the pack pictured above, but hopefully you understand the concept.
● Sleeping Bag Compartment
The sleeping bag compartment is usually located on the bottom of your pack. It’s typically a water resistant compartment that allows you to easily load/unload your sleeping bag without emptying out your entire pack.
Sleeping bag compartments are one of those features that you don’t know you need until you actually use one. Your sleeping bag is usually one of the last things you pack when tearing down camp. So it sits up at the top of your pack and you’re constantly pulling out while digging through gear. A sleeping bag compartment gets it out of the way so you don’t have to dig around a bulky sleeping bag.
● Top Access Pocket
This is the pocket at the top of your pack where you keep anything that you need to quickly access. Store your first aid kit, maps, guides, sunscreen, bug spray, sunglasses, etc. in this pocket. The top pocket usually zippers closed and falls above main access compartment.
● Hip Belt Pockets (aka Hip Pouches)
Most modern backpacks included hip pockets that allow you to quickly access gear on the trail. It serves a similar purpose to your top access pocket, but hip pockets are easier to access. You don’t have to take off your pack to get into these pockets.
Just reach down and unzip the pocket for easy access to important pieces of gear. I usually keep snacks, my phone, map, sunscreen, sunglasses, chafing cream, and other random important accessories in this pocket.
● Side Access Panel
The side access pocket allows you to dig through the middle of your pack without pulling out all your gear. A side access pocket isn’t entirely necessary, but it comes in handy. You don’t want to unload your entire pack just to get at a random piece of gear stored in the middle.
● Hydration Bladder Pocket
You will most likely find gear loops on the outside of your pack. Gear straps are located around the sides and bottom of your pack. Use these straps to attach accessories that either can’t fit or your don’t want inside your pack. I usually strap my foam sleeping pad, bear canister, and anything that could damage the gear inside my pack using the gear loops.
● Water Bottle Holder
The purpose of the water bottle pocket should be fairly obvious. This is where you store your water bottle. It can also be used to store loose gear if you’re using a hydration bladder instead.
4) Parts Of A Backpack: Gear Attachment and Accessories
This section will be a little bit different. Every backpack has different attachment points so I included pictures to help guide you through different attachment points. Each backpack is different. So make sure the pack you choose has the necessary attachments and accessory features.
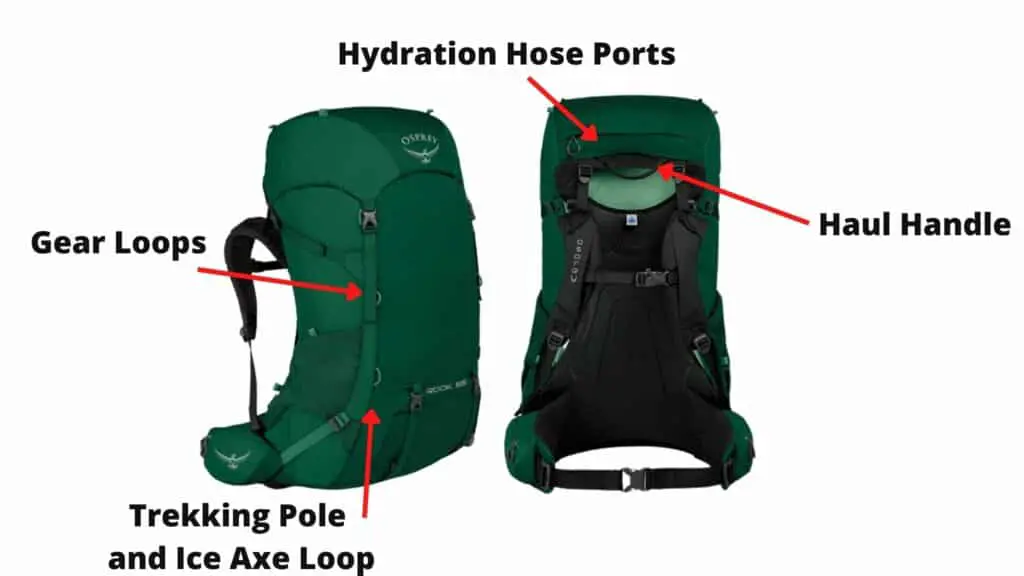
● Haul Handle
As the name implies, the haul handle is what you use to pick the pack up off the ground. They serve a secondary purpose of allowing you to hang up your pack in storage, but I wouldn’t pick up a fully loaded pack by the haul handle. They’re rarely strong enough to support the weight of a 40+ pound pack.
● Gear Loops
You will most likely find gear loops on the outside of your pack. Gear straps are located around the sides and bottom of your pack. Use these straps to attach accessories that either can’t fit or your don’t want inside your pack. I usually strap my foam sleeping pad, bear canister, and anything that could damage the gear inside my pack using the gear loops.
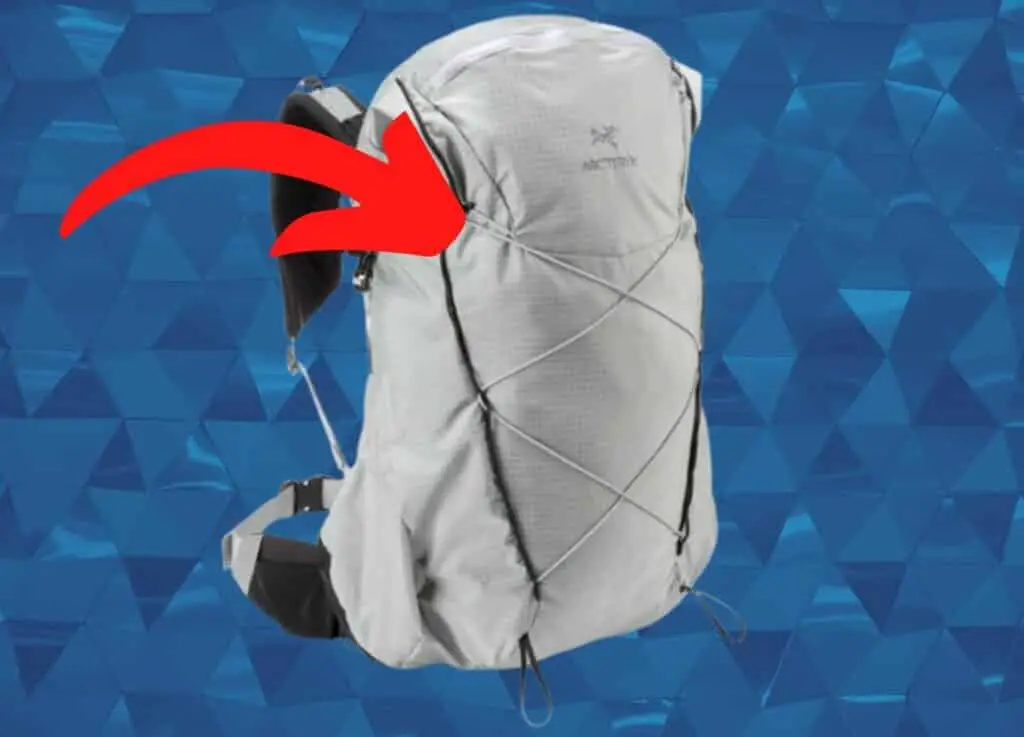
● Hydration Hose Port and Hose Clip
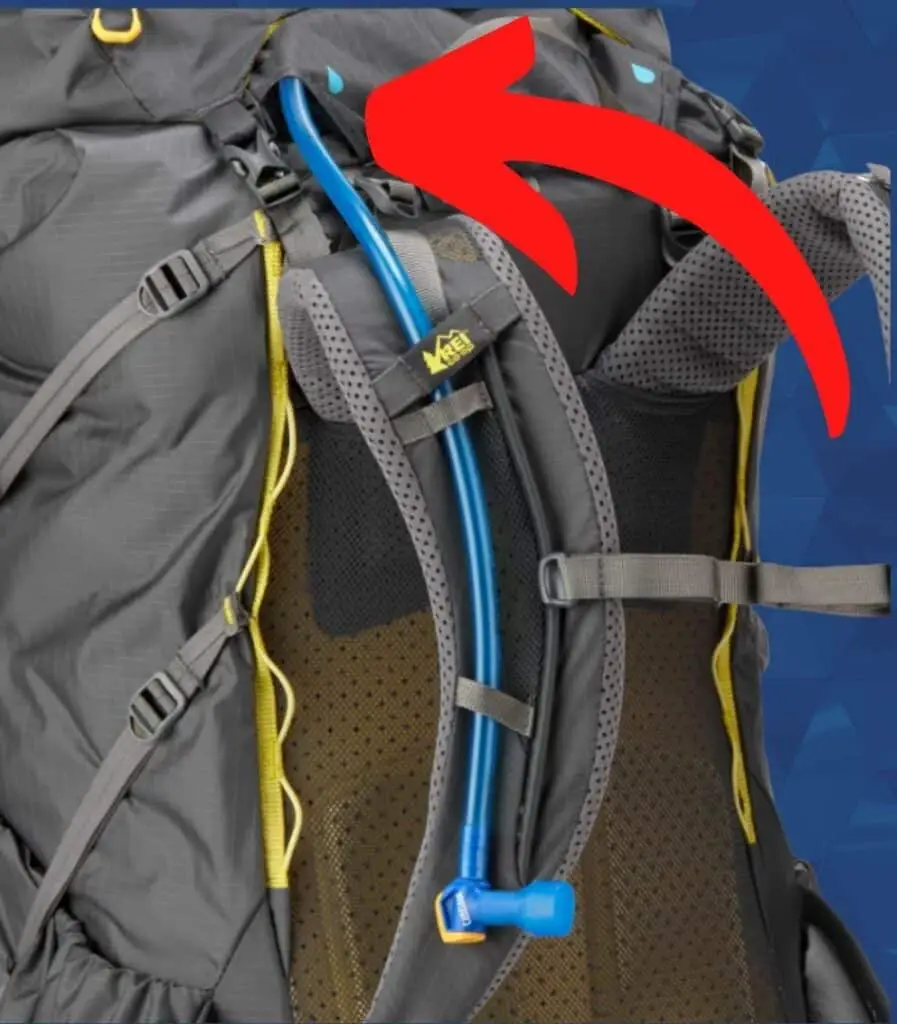
The hydration hose port is a small hole located at the top of your pack. This is where you feed your hydration bladders hose through the pack for easy access to water. Most packs also have hydration tube clips to control the tube while it’s not in use.
If your pack doesn’t have a hydration tube port, you can run the tube through a small opening in the top of your pack. The only downside to this method is that it will allow water to get into your pack when it rains. Make sure you use a rain cover if you feed the line through the top of your pack.
● Daisy Chains
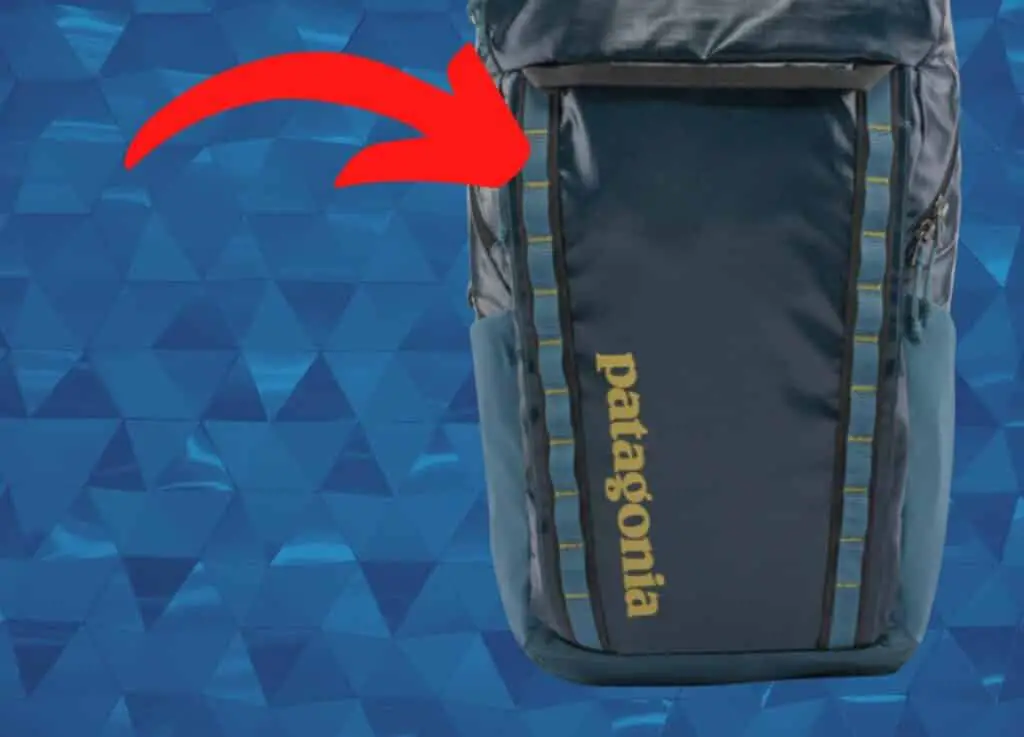
Your pack may or may not have Daisy Chains running down the side of the pack. Daisy chains are one of those things that people rarely take advantage of. Just clip a carabiner to the daisy chain and strap small accessories to the outside of your pack.
● Ice Axe Loops
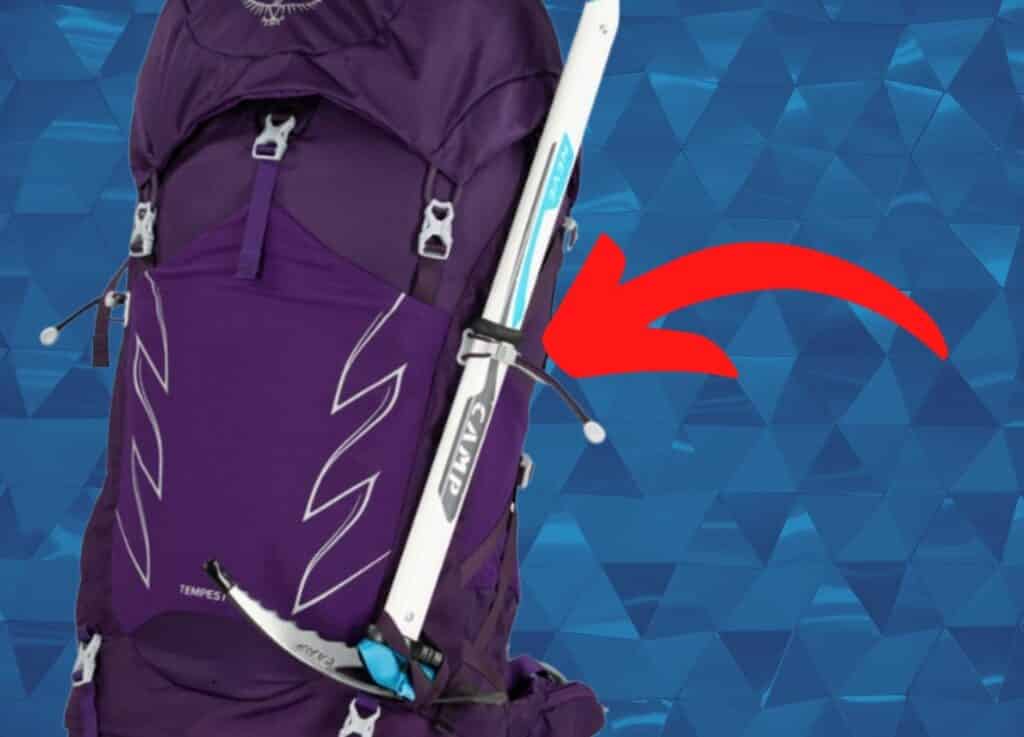
Ice axe loops are usually found at the bottom and sides of your pack. The ice axe loops are designed to secure the head of your ice axe to the back of your pack. It prevents the ice axe from rotating and slitting a hole in your pack and catching on objects as you walk.
The head of the axe should be secured on the main ice axe loop and the handle can be secured with any of the other attachment points or compression straps located higher up on the pack.
● Trekking Pole Attachment
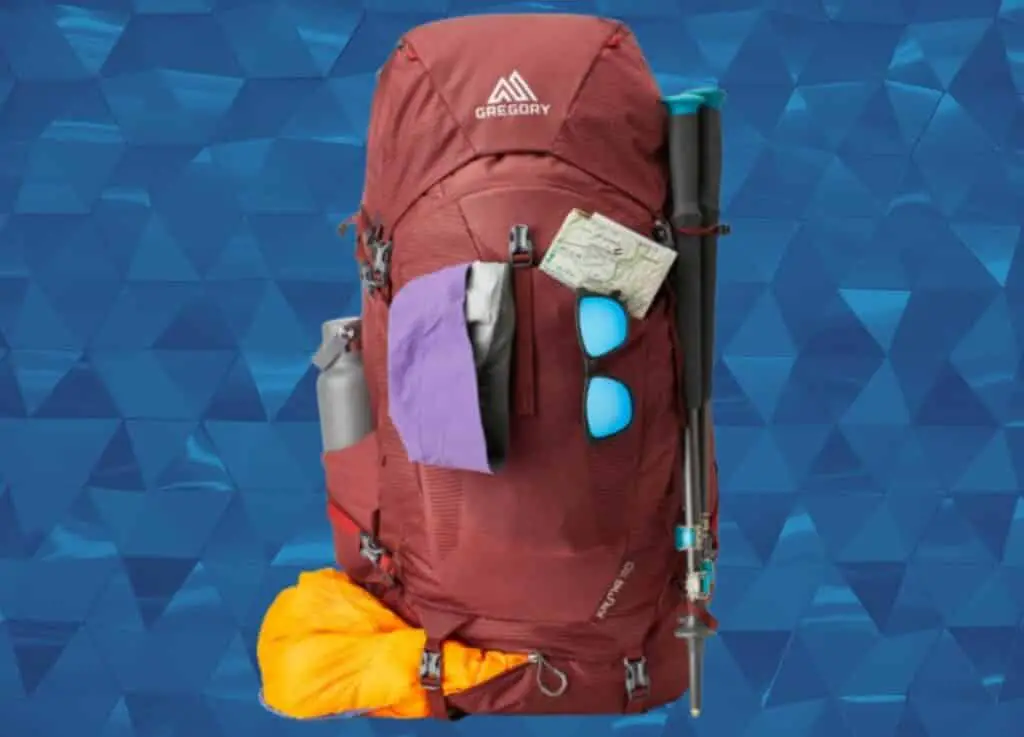
Trekking pole attachments serve a similar purpose to the ice axe loop. It may even be the same loop that you use to attach your ice axe in the winter. Just run the bottom of your trekking poles through the lower loop and secure the body of the poles through attachment points located higher on the pack.
● Rain Cover
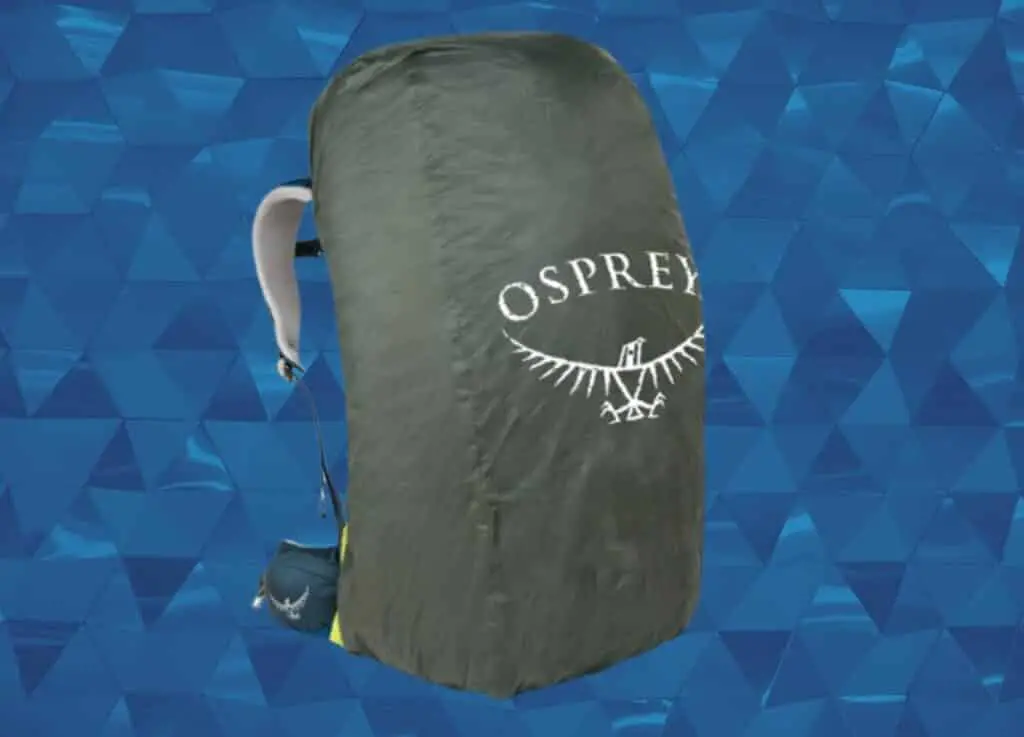
The primary purpose of a rain cover is to prevent rain from soaking into your packs fabric, but rain will still make its way into your pack. You need to use a pack liner to completely protect your gear from exterior water. They sell dedicated pack liners, but I recommend using a compactor bag instead.
Compactor bags are a much cheaper option that works as well as a real pack liner. They’re designed to stretch in a trash compactor so they’re extremely durable and puncture proof. A compactor bag should last an entire backpacking trip without punctures, but you may need to repair holes with duct tape on thru-hikes and longer trips.
● Shock Cord
Most backpacks don’t have shock cord running along the front panel, but you can easily add it to your pack. Shock cord is a flexible elastic cable that you use to secure bulky gear to the outside of your pack. I recommend purchasing shock cord from Paracord Planet On Amazon. It’s a cheap addition to your pack that’s extremely useful.


