Almost every hiker has encountered a switchback at some point. You may not have realized what it was called, but they’re extremely common in hilly and mountainous terrain. So you’ve never heard of a switchback trail before? Let’s explain what a switchback is and go over when they’re useful.
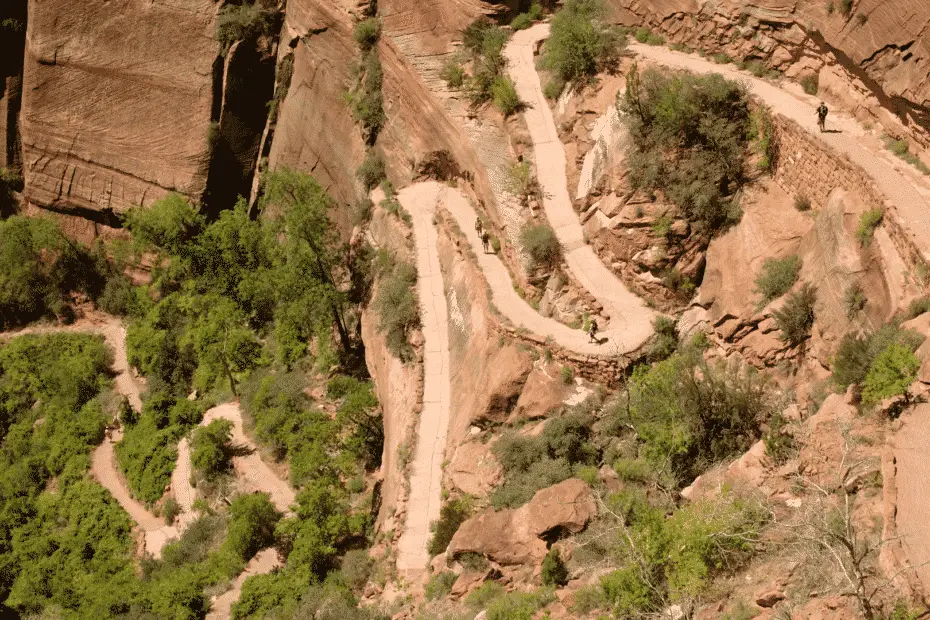
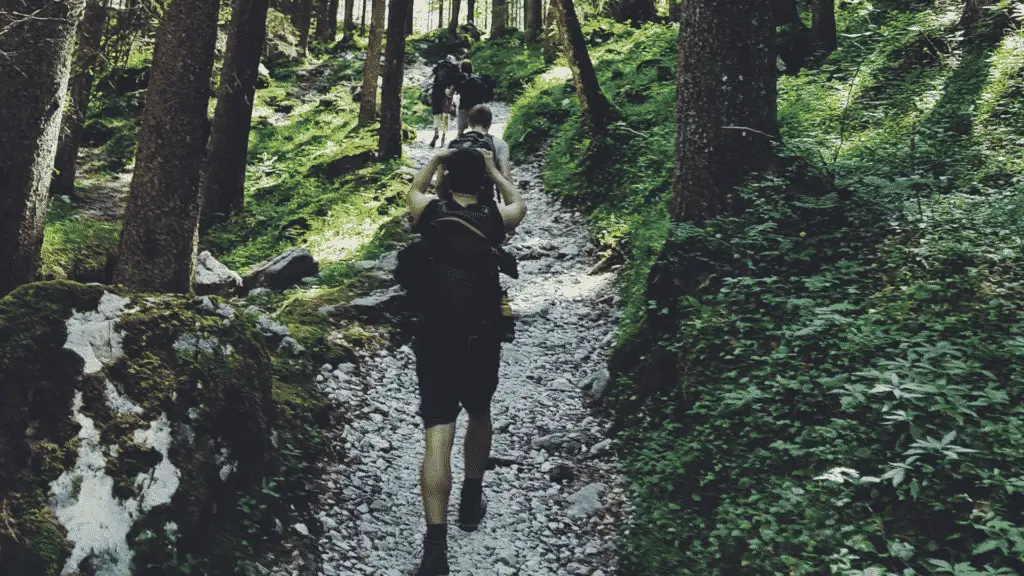
What Is A Hiking Switchback? A switchback is any trail that follows a zig-zag pattern up a steep hill or mountainside. There’s a gradual incline up the mountain instead of climbing straight up to the summit. Hiking a switchback is a much safer and less strenuous way to climb up a hill or mountain.
A long strenuous hike filled with multiple switchbacks can be a challenge, but it’s a safe/easier way to get up a steep incline. Climbing a switchback trail will test your leg strength and endurance, but the views from the top are well worth the climb.
Table Of Contents
Why Are Switchback Trails Built?
Switchbacks are extremely common and you’ve probably encountered one in the past without realizing it. Almost every mountain or hillside trail uses switchbacks to provide a safe and much easier way up the hill.
You’ve encountered a switchback on any trail that runs horizontally along the hillside and cuts back in the opposite direction. The trail will look like a zig-zag pattern up the mountain or hill. Switchback trails make climbing a mountain accessible to people that wouldn’t be able to take a direct route.
Climbing a hill will always be a challenge, but it’s much easier to climb a switchback than take a direct route up the hillside. It’s both easier and safer to hike a long trail with a 2%-3% elevation change than head directly up a hillside with a 30%+ grade climb.
Switchback trails make your hiking experience manageable instead of making your climb directly up the hillside. It reduces the grade of the climb making for a safe and much easier route. There’s less of a risk of losing your footing and tumbling down the hillside reducing the chance of injury.
Switchbacks also help protect the trail from excessive erosion that could cause loose soil and dangerous falls. The trails run at a consistent grade up the hillside so trail planners can control erosion. They divert water around and under the trail so there’s less risk of damage to the trail.
Lombard Street In San Francisco

It’s not a trail, but Lombard street in San Francisco is a perfect example of a switchback. Lombard street is known as the crookedest street in the world. Look at how the road winds it’s way down the hillside instead of taking a direct route.
Cars couldn’t handle the steep 27% grade when the road was built so they had to use zig-zig switchbacks to reduce the grade. Using the switchbacks reduced the grade to 10% at the steepest point. That’s much steeper than most switchbacks you’ll find on a hiking trail, but it’s a perfect example.
A typical switchback will have a modest 2-3 percent grade depending in the elevation change and trail length. That doesn’t seem like a lot, but your calves will be burning by the time you reach the summit. With that being said, it’s still much easier and safer than a direct climb.
Switchbacks Vs A Direct Climb Up The Hill
Switchbacks are great from a safety and difficulty standpoint, but there is a major problem. A straight path will always be a shorter distance than a long zig-zag route. Switchbacks are easier, but it turns a steep one mile route into a winding 7+ mile winding hike.
You’re trading a much farther and longer hike at low elevation for an easier much safer climb. It’s hard to say which route will actually be faster. It depends on your climbing experience level, hill grade, and trail difficulty.
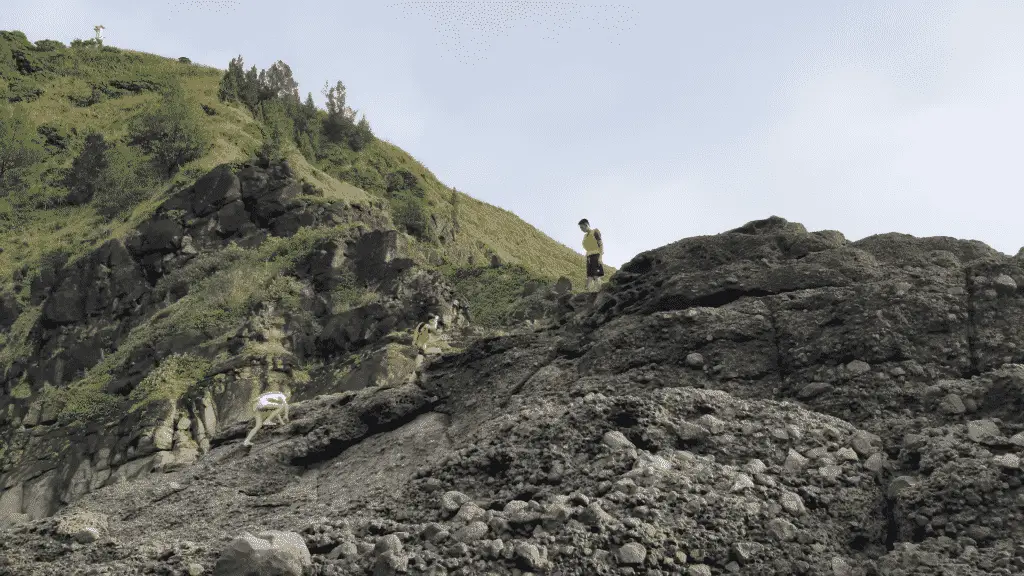
Anybody that’s climbed a steep hill knows how challenging it can be. Have you ever walked up a steep sidewalk? Most people get calf cramps and are gasping for air by the top. Now imagine climbing a hillside with uneven terrain and loose rocky soil.
You’ll be dead tired and struggling to find your footing all the way up. I’ll trade that for a long winding switchback trail any day of the week. You don’t realize how challenging a steep mountain scramble is until you experience one.
Training For A Switchback Trail
I grew up in a fairly flat part of Ohio for most of my younger life. The city I grew up in had a decent elevation, but the steepest trails around me have less than a 500ft change in elevation. There are a few modest switchback trails near me, but they’re a joke compared to switchbacks in mountainous terrain.
Once my family moved out to Seattle I quickly realized that there’s a big difference between hiking Ohio trails and working your way up a mountain. I played football in high school and thought I was an athlete, but some of those hills on the outskirts of Seattle killed me.
My family took a short trip to Mount Si a few weeks after moving into our house in the Seattle suburbs. It’s a 4,167′ 7.5 mile long switchback trail up the mountain. It’s considered a beginner trail suitable for all ages, but I barely made it up the mountain.
My legs were cramping, I was gasping for air, and absolutely miserable the whole way up. I wouldn’t have made it had it not been for the constant stream of people telling me I was almost there. After that hike, I quickly realized that I’d need to get stronger if I wanted to keep hiking.
Getting Used To Switchback Trails
Training for a switchback trail is fairly straightforward. Hiking at an incline is much different than following a flat grade. Hiking at a modest elevation isn’t all that difficult. You need to strengthen your legs and increase your cardio levels.
Elevation requires strong/flexible calves and hamstrings. So that’s where you need to focus your training. I recommend taking a 2 stage approach to training. You can’t just focus on building leg strength; climbing steep hills also requires flexibility.
Hike at least once per week at elevation and train at home on your off days. I found moderately steep trails near my house to hike on the weekends and used my treadmill at the highest elevation and climbed stairs during the week. You should stretch out your entire body before and after every workout.
You will sore for the first couple weeks, but it doesn’t take long to get used to the elevation gain. Start off slow and build up your mileage over time. After a month or two climbing a switchback trail won’t be a challenge.
Start Using Trekking Poles
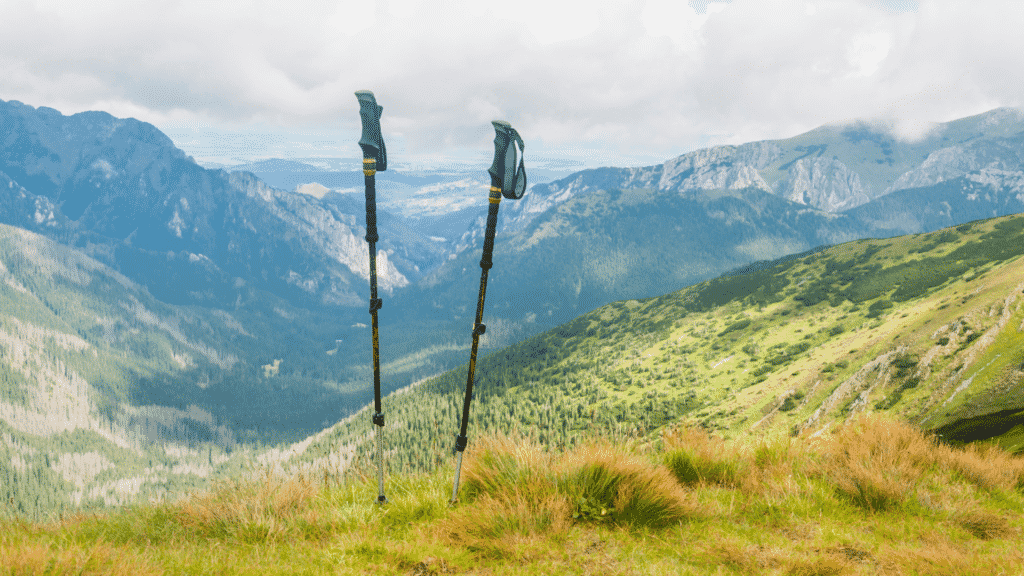
Throughout most of my life, I never understood the purpose of trekking poles. They seemed like a nuisance that didn’t serve much of a purpose. I immediately realized the difference once I started hiking steep switchback trails.
Researches estimate that trekking poles take 20% of the weight off of each step you take. I’m a 200lb athletic guy that carries a 20lb pack on day hikes. So that’s like instantly dropping 45lbs of weight just by using trekking poles. That’s equal to a 5 gallon jug of water coming off my legs which makes a huge difference on a long steep trail.
Trekking poles make an even bigger difference when travelling downhill. The weight of gravity is pulling you down the hill and will destroy your knees. You can strengthen your legs for going up hill, but you can’t strengthen the ligaments in your knees. Trekking poles and reducing pack weight are the only surefire way to take stress off your knees.
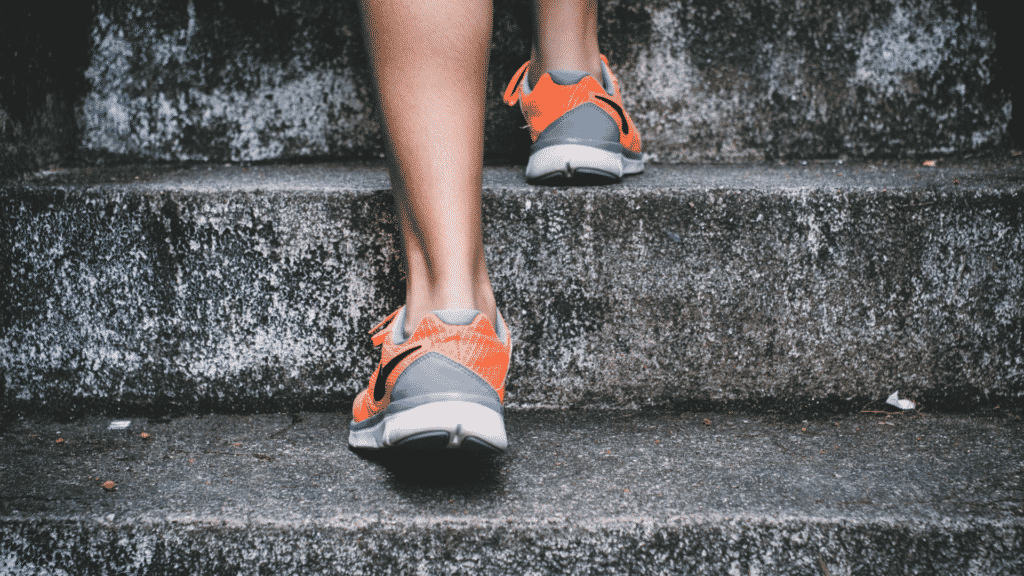
Wear Lighter Hiking Shoes and Reduce Your Pack Weight
When I first started hiking at elevation I would hike in a pair of military combat boots or mid/high ankle hiking boots. I’ve had ankle injuries in the past and wanted ankle support on steep terrain. That seemed like a good idea at the time, but after years of hiking without injury I switched to lightweight trail runners.
Switching over to trail runners was a night and day difference. There’s an old saying that “1lb on your feet equals 5lbs in your pack”. It’s hard to say if that’s perfectly accurate, but it seems close. Reducing the weight of your shoes will make climbing switchback trails much easier.
Reducing your pack weight will also help take weight off your legs and knees. Try to limit your pack weight to 20lbs or less on longer day hikes. I’ll get into the gear you need to carry in the next section, but you really don’t need to carry that much gear.
What To Pack For A Switchback Hike
Packing light is the key to hiking at high elevations. You really don’t need to carry all that much gear for a day hike. Focus on the ten essentials and try to limit your trail weight. This guide is for a day hike. You’ll need to add in sleeping gear and extra food if you’re staying overnight.
- Pack: Go with a 15-20 liter pack for a longer switchback hike. It’s light enough to keep your trail weight down, but there’s more than enough space for a full length day hike.
- Water: Water bottles work, but hydration pack compatible backpack is your best bet. You can carry a larger water supply that’s spread evenly across your back. Plan on drinking at least 3-4 liters of water on a longer hike so don’t forget to bring a water filter to refill your hydration bladder on the trail. I use a cheap a Sawyer Mini Water Filter as an inline filter with my hydration bag.
- Food: You burn a lot of calories hiking uphill. Eat a high calorie breakfast, bring lots of snacks, and a meal to eat along the way. I usually carry at least 2000 calories on 7+ mile switchback hike plus a high calorie meal in the morning.
- Navigation Equipment: Always carry navigational equipment regardless of where you’re hiking. It might not be necessary on popular well traveled trails, but it’s always a good idea to have a compass, map, and GPS.
- Headlamp or Flashlight: You never know how long it will take to finish a long uphill hike. A 10 mile loop will take 3-4 hours on flat ground, but it can take twice that long on a switchback trail. Bring a flashlight/headlamp just in case you get caught outside after dark. All you need is 100-150 lumens to hike at night so any cheap headlamp will work. Black Diamond’s Astro 250 Headlamp is a cheap AAA battery operated headlamp that’s perfect in an emergency.
- First Aid-Kit: I always carry a first aid-kit, but thankfully I’ve never needed to use it for anything serious. The only time it gets used is for blister/chafing prevention cream (Desitin) and the occasional band-aid.
- Trekking Poles: Trekking poles make a huge difference when climbing up and down a hillside. Researchers estimate that trekking poles reduce the weight on your feet by 20% with every step you take.
- Weather Appropriate Clothing: It gets much colder as you ascend a tall mountain. The air gets cooler and the wind amplifies above the tree line. Carry a lightweight jacket even if you don’t think you’ll need it. I also recommend merino wool socks (my favorite) to prevent blisters and sweaty feet.
- Knife or Multi-Tool: A knife or multi-tool is one of the 10 essential pieces of backpacking/hiking gear. You never know when you’ll need to use it.
Research The Trail Before Heading Out
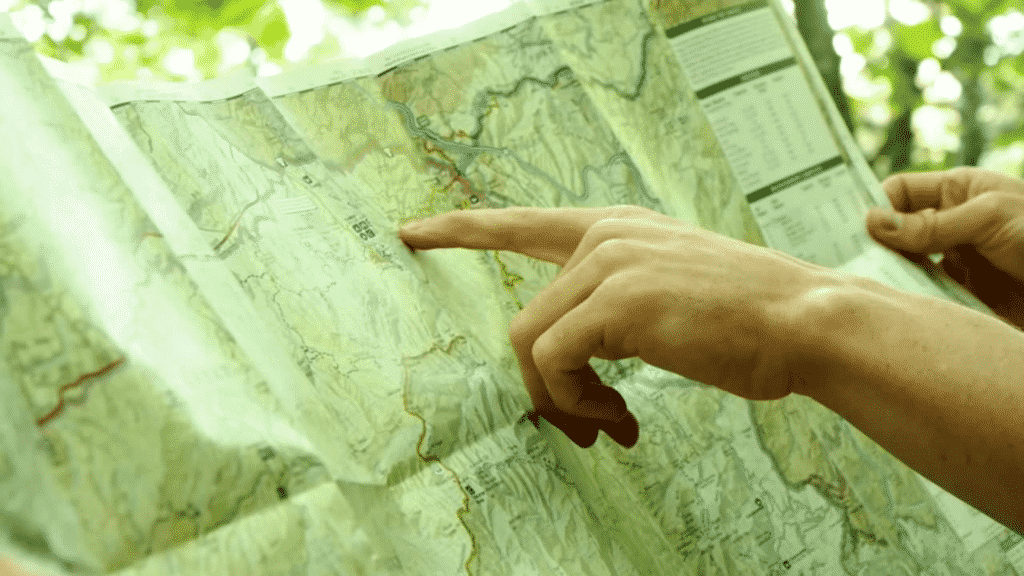
You need to take a look at the trail before heading out on any switchback hike. Trail maps will tell you the elevation gain, map out water sources, give you an estimate of the trail length and time it will take you to complete the hike.
Check how many switchbacks you’ll be taking and make sure you pay special attention to the trail difficulty and type of terrain you will experience. Researching ahead of time will tell you how much gear you’ll need and give you a rough idea of the challenges you’ll face.
Plan Out Your Water Supply
It can be very hard to find water on the side of a hill or mountain. You might run into a small source of water, but it depends where you’re hiking. Most of the time you’ll need to pack in all of the water you need for the day. I still recommend carrying a water filter in case you run across a fresh water, but don’t rely on that alone.
A 2 liter hydration bladder is the bare minimum for a 8-10 mile hike. I usually carry my 3 Liter hydration bladder with an inline Sawyer Mini Filter. It gives me a little bit more water than I’d typically need which really helps with leg cramps. Hiking uphill makes me sweat heavily so I go through a lot of water.


