Keeping mold and bacteria out of your water bottle and hydration bladder is a constant battle. Even with the most expensive gear on the market you have to stay on top of cleaning. The only way to battle mold is to constantly clean your water bottle/bladder after every use.
Table Of Contents
It’s All About Routine!
After a long hike or trip it can be tempting to just sink into the couch and relax. Avoid the temptation and get a leg up on your basic cleaning tasks. The sooner you clean your hiking gear the easier it’s going to be.
Whenever I get home from a hike I wash out my water bottle and hydration bladder and hang it upside down. You need to really get out all that moisture to prevent bacteria build up. After a bit use a paper towel to further dry out the inside.
How to Clean Hiking Water Bottles
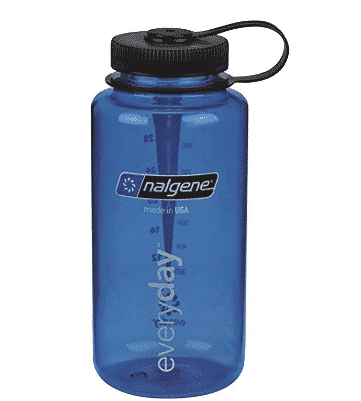
Cleaning out your plastic or reusable water bottles should be pretty straightforward. Problems start to arise when we get lazy and mold/bacteria starts to build up. You start to get that nasty taste/smell that just doesn’t seem quite right.
Every time you use a water bottle it needs to be rinsed out and air dried completely. Remember to never leave liquid in your water bottle for extended periods. That’s a recipe for nasty hard to clean mold.
Avoid Sugary Liquids
Sugary liquids like juice, gatorade ETC are a recipe for nasty bacteria. Bacteria feasts on sugar leaving you with a mess almost overnight. Leaving sugary drinks inside your water bottle/bladder will leave you with a nasty mess. You’ll have all kinds of nasty molds, unpleasant tastes and smells.
What if You Have a Moldy Water Bottle?
Nobody’s perfect, we all forget to clean up after ourselves once in a while. If you’re water bottle is already nasty you’re going to need a new water bottle brush(this is the one I use).
I really like the slim silicone brushes with the long narrow handles. After a few uses just toss your silicone brush into the dishwasher to give it a good cleaning. There’s just something off putting about the bristle brushes once they start to change colors.
Most bottles only need a little scrubbing with a bottle brush and a quick rinse. Once again, you need to make sure your bottle is completely dry afterwards.
Cleaning a Gross Mess
Sometimes your water bottle is just a little too nasty for a scrubber to take care of it. When you need a deep clean throw in a little baking soda into your soap and water mix.
Throw a few teaspoons of baking soda into hot water and let it rest overnight. I like to pour in a little bit of bleach as well (I love these no splash bleach crystals). Rinse out the water bottle in the morning and toss it in the dishwasher for a cycle. Afterwards let the bottle dry completely before replacing the lid.
You can also soak your water bottle in white vinegar and let it sit overnight. Only problem with vinegar is you’ll end up with a slight vinegar odor left behind. It fades quickly but I hate that aftertaste on a hot summer day.
Stainless Steel Bottles
Stainless steel bottles should be cleaned just like a regular plastic water bottle. All of the above techniques should work, but avoid placing it in the dishwasher. Most of the double wall insulated water bottles are hand wash only.
How to Clean Hydration Bladders
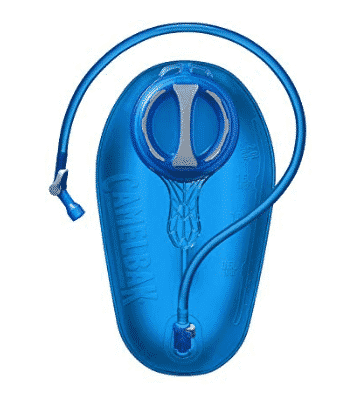
Hydration bladders have been around since the early 80’s yet very few people seem to use them. They used to be a serious pain in the butt to clean, but throughout the years it’s gotten a lot easier.
Cleaning a hydration bladder is all about regular maintenance. Leave water sit for more than a couple days and you’re going to need a replacement. Most of the time a quick rinse and dry cycle is all you really need. When it’s time for a deep cleaning you’ll need to turn to common cleaning solutions.
Hydration Bladder Cleaning Tablets
By far the best way to clean a hydration bladder is to use a cleaning tablet. The only problem is they can be somewhat expensive. (check out the price) However, at about 50 cents per tab they are definitely worth it.
All you need to do is fill up your hydration bladder with hot water and drop in the tab. The Acid based cleaning solution will make quick work of the mold and bacteria in your reservoir.
Let the acid solution sit for 30 minutes to an hour, empty it out and rinse it with clean water. Either hang your reservoir upside down to dry or use it because it’s ready to go.
Cleaning With Common Household Cleaners
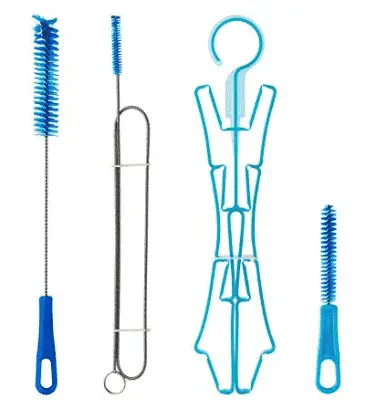
Once again you’re probably going to need a brush kit to clean out your hydration bladder (this kit is great). Just make sure you have a long flexible brush to get into the hose and mouth piece.
Fill up your bladder with warm water and add your favorite cleaning solution. Personally I would either use baking soda and a few drops of bleach, or lemon juice.
Once you’ve added the cleaning solution pinch the hose on your mouth piece and give everything a quick shake. After everything is coated in the solution let your reservoir sit for 20-30 minutes and drain out the system.
Once again rinse everything out with warm soapy water and scrub out the inside. Use your hose brush to clean out all the nooks and crannies making sure you pay special attention to the bite valve. Mold and bacteria flock to all those little connections and they’ll get nasty fast if you aren’t careful.
Most hydration bladder brush kits come with a hydration bladder hanger, but I typically just hang it from my coat hook. Prop open the bladder with a spoon or clothes pin and let it sit overnight. After 24 hours it should be good to go into storage or back on the trail.


