Picking out winter backpacking gear is always tricky. You can’t just rush into it half-cocked expecting everything to be alright. Dealing with cold weather brings along a long list of challenges. Having to deal with a frozen water bottle shouldn’t be one of them.
With a little planning and the right gear, there’s no reason why your water bottle or hydration bladder should ever freeze. So how do you stop your water from freezing on winter backpacking trips?
It’s all about choosing the right water bottle or hydration bladder and making sure it’s properly insulated.
Table Of Contents
Water Bottles vs Hydration Bladders on Winter Hikes
Experimenting with different gear is one of my favorite things about backpacking. Ask 1000 backpackers what they have in their pack and you’ll get a different answer from everybody. Having a successful backpacking trip is all about finding the gear that works for you.
Backpackers seem to be split on whether or not you should use water bottles or hydration bladders in the winter. You will never get everybody to agree(nor should they), but I think everybody would agree on these 5 simple facts.
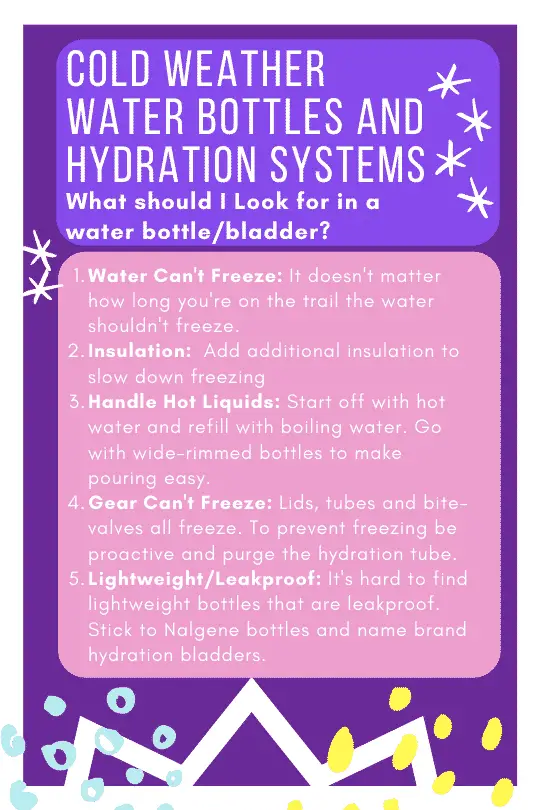
- Water Can’t Freeze: You have to stop water from freezing. This is typically done with insulation, using warm water
- Insulate Your Bottle/Hydration System: Proper insulation is the only way to truly stop your water bottle from freezing. You usually need to add additional insulation.
- Needs to Handle Hot Liquids: If you want to be able to refill your bottle it needs to be able to handle hot liquids. You need to be able to pour boiling water straight from the pot to the bottle/bladder.
- Gear Cant Freeze in Place: Avoid metal bottles that often freeze in place and non-insulated gear. You don’t want a frozen bite valve on your hydration bladder.
- Lightweight and Leakproof: Find a bottle that’s lightweight, durable and leakproof. Remember that you will most likely sleep with your water bottles so they won’t freeze throughout the night.
I Like Water Bottles in The Winter
It all boils down to personal preference, but I prefer water bottles in the winter. I just think they’re easier to clean, refill and less likely to freeze. Hydration bladders work great down to about 20 degrees, but it gets increasingly hard to prevent freezing at that point.
How to Prevent Water Bottles and Hydration Bladder From Freezing
Backpacking in the winter doesn’t need to be difficult. There’s definitely a slight learning curve that you have to overcome. Keeping your water from freezing isn’t all that difficult. All it takes is the right gear and a little TLC.
Insulating Your Water
How do you prevent water from freezing on a winter hike? It’s all about properly insulating your water bottle or hydration bladder.
You need to either purchase insulated sleeves for your water bottle or an insulated pouch for your hydration bladder and sock for the hydration tube. Proper insulation will significantly reduce the freeze risk.
What’s The Best Bottle For Winter Hiking?
If you can find an insulation sleeve you can use just about any water bottle for winter backpacking trips. Just stick to what you know and look for ways to further insulate your gear.
Winter isn’t the time to test out new gear. If you haven’t dialed in your gear during the summer don’t test it in the winter. Everything is just so much harder once you put on those gloves.
Don’t Use Metal Water Bottles
In the past couple of years, those double-wall insulated bottles have been gaining popularity. They’re really good at keeping water warm/cool, but they’re seriously heavy. Like three times heavier than a standard water bottle. That weight really adds up when you have to carry 3-4 bottles.
You also have to deal with freezing issues in those double-wall metal bottles. I’m not talking about your water freezing, the threads on the lid will actually freeze to the bottle. This means no more water until the end of the day.
What to Look For in a Winter Bottle
- Insulated Sleeve: You have to be able to purchase an insulated sleeve for your water bottle. It’s just not possible to prevent freezing without an insulated sleeve. That’s why Nalgene’s come in handy. There are just so many accessories available.
- Wide-Mouth Design: Wide-Mouth bottles prevent freezing in cold weather. Water always freezes starting from the top at the narrowest point. Wide bottles significantly slow down the freezing process.
- Durable Construction: The only way to prevent freezing at night is to sleep with your bottle. That means the bottle needs to be extremely durable and leak proof.
- Capable of Holding Hot Water: Your bottle has to be able to hold hot water. Hot water is less likely to freeze throughout the day. Plus once you need to refill the bottle you have to be able to pour in boiling water.
Nalgene Bottles for Winter Backpacking

Most backpackers use the same old Nalgene bottle that they carry in the summer. Nalgene bottles are extremely durable (almost indestructible), leakproof, capable of holding boiling hot water, and there are loads of accessories available.
They will also be easier to refill and clean, plus you probably have a few Nalgene’s sitting around so that will save you some cash. If you don’t already have a Nalgene stick to the 32oz Wide-Mouth design(On Amazon). The wide mouth makes it so much easier to refill on the trail. You don’t want to accidentally spill boiling water on your hands/gloves while you’re melting snow.
Just make sure you pick up an insulated sleeve that wraps around the entire bottle. Insulation sleeves that only insulate the sides/bottom won’t prevent freezing. Go with the one that’s actually designed by Nalgene(On Amazon).
Storing Your Nalgene Bottles on The Trail
The easiest way to carry Nalgenes is to just use an insulation sleeve for all your bottles. Fill the bottles up with hot water at the beginning of the day and they should stay warm all day. Hang one from your hip belt and put the rest in the top of your pack. Wrap them up with an extra jacket and toss them in your pack, they should stay warm all day long.
My Main Problem With Nalgene Water Bottles
There’s one major downside to using a Nalgene water bottle. Every time you need to take a drink you have to take off your gloves/mittens. As the temperature drops, this gets harder and harder.
You have to unzip the insulated sleeve and unscrew the top before taking a sip. In extreme cold, you might want to go with a bottle designed for mountaineering. They tend to have bigger wider mouths and taller tops so you can open them without taking off your gloves.
Hydration Systems for Winter Backpacking
In the past decade or so hydration systems have become increasingly popular. I know lots of people that use hydration bladders from companies like Camelbak, Hydrapak, and Platypus.
Personally, I only use hydration bladders on day hikes. I just think they’re harder to refill than water bottles. My hands are just too shaky in cold weather to refill my bladder with boiling water. That being said I do know a lot of people that love hydration systems in the winter.
Insulate Your Hydration Bladder and Tube
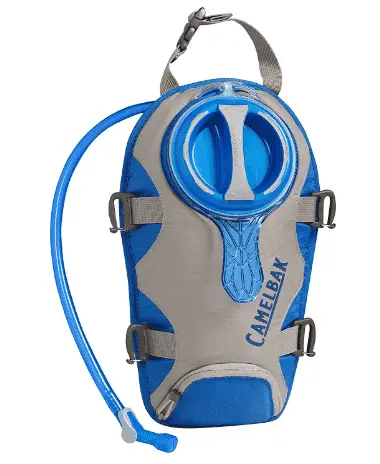
If you want to use a hydration system get one with an insulated hydration bladder like the Insulated Camelbak Unbottle (On Amazon), and an insulated tube(On Amazon).
In extreme cold, you need to add even more insulation. Either make your own or check out Amazon/Ebay for cheap insulation sleeves and tube socks. Some guys even wrap their hydration tubes with foam pool noodles. It’s crazy how creative backpackers actually are.
Hydration Packs Aren’t Big Enough
Companies like Camelbak and Osprey sell snowsport specific hydration packs with lots of insulation, but these aren’t very big. They’re mostly designed for snowboarding/skiing so they tend to be lightweight and aerodynamic.
These might work on short day trips, but you’ll need bigger packs for extended backpacking trips. Just make sure your pack is “Hydration Bladder Compatible” and plan on adding extra insulation so you can use a hydration system.
Keeping Your Hydration Bladder Warm
Talk to anybody in the hydration bladder industry and they’ll tell your body heat will keep the hydration bladder from freezing, but that’s not gonna happen. You need to be proactive to prevent freezing.
- Use Boiling Water: At the beginning of the day start off with boiling water. Wait for the water to cool a bit before taking a sip. It’s hard to take small sips when you’re sucking through a bite valve so you’ll end up burning your mouth.
- Insulate The Bladder: Insulation is by far the most important thing. When it comes to insulation think big(more is always better). Wrap the bladder with clothes, additional sleeves, anything you have in your pack. Don’t forget to add additional insulation to the tube and purge the bite valve.
- Use Hand Warmers: Hydration systems work well down to about 10-15 degrees. After that, you might need to add outside heat. Just toss a hand warmer into your pack’s hydration pocket for additional heat.
Purging Your Hydration Tube
With proper insulation, your bladder shouldn’t freeze, but you still need to deal with the tube and bite valve. There’s just no way to insulate the bite valve without making it hard to use. If you aren’t careful the bite valve will freeze in like 30 minutes. To prevent this you need to “purge” the tube.
To purge your bite valve/tube simply blow back into the tube after taking a sip. This pushes all the remaining water back into the hydration bladder so it stays warm.
Trust me, this is easier said than done. It took forever for this practice to become automatic. You’re gonna forget at first and end up with a frozen bite valve.
If the bite valve freezes just tuck it down your shirt or back with your hydration bladder. Body heat and heat from the bladder will thaw out the bite valve.
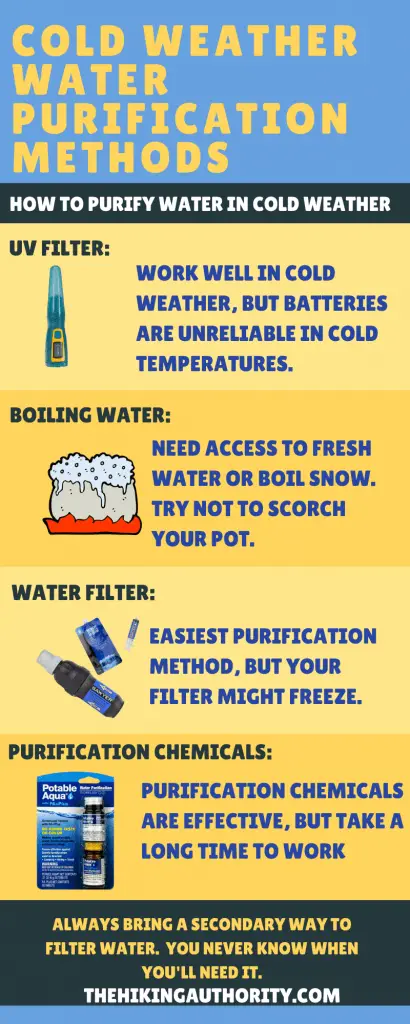
Winter Water Purification
I won’t dive all that deep into winter water purification methods, but you have a few choices. Which method you choose mostly depends on whether or not you have access to liquid water.
Check out my in-depth guide explaining winter water purification methods.