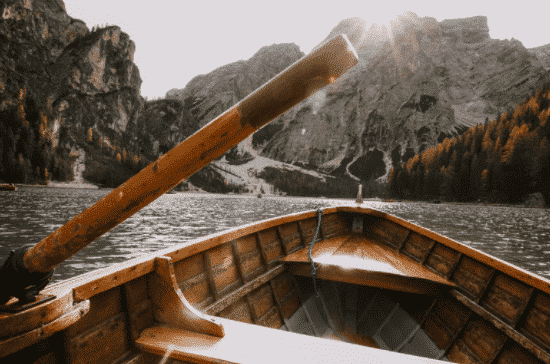
Have you ever dreamed of visiting unexplored coves and camping from the gear in your canoe? I’ve been canoeing for most of my life and I’ve barely scratched the surface of my surrounding towns. There’s an endless list of destinations you can explore from the top of your canoe. But how do you get started? Where do you go? What will you pack? What do you need to know to start canoe camping?
In this post, I’m going to explain everything you need to know before your first canoe camping trip. I’ll explain how to pick destinations, plan your trip, buy a canoe, all the gear you need, give packing tips, teach you how to cook, and go over everything you need to do at camp (plus more).
I’m just warning you that this is a ridiculously long guide. I highly recommend looking over everything, but you may want to look over the table of contents and jump to areas you’re interested in learning more.
Table Of Contents
The Ultimate Canoe Camping Guide For Beginners and Experienced Campers
Most people that are looking for an authentic camping experience start off with backpacking. Backpacking is an enjoyable way to get out into nature, but sometimes you need a change of pace. You’re limited to the gear in your pack and there are places you can’t go on foot.
That’s where canoe camping comes into the picture. Canoe camping is very similar to backpacking, but move down the river instead of hiking down the trail. You won’t have to carry a pack so there’s less of a focus on trail weight, which allows you to carry less heavier gear that’s much less expensive.
Canoe camping is an authentic wilderness experience that doesn’t require a lot of skill to get started. You need to be able to paddle the canoe, but it’s less physically demanding than backpacking with a heavy pack. Everything gets loaded in your canoe and the water current will pull you down the river in no time.
What Is Canoe Camping?
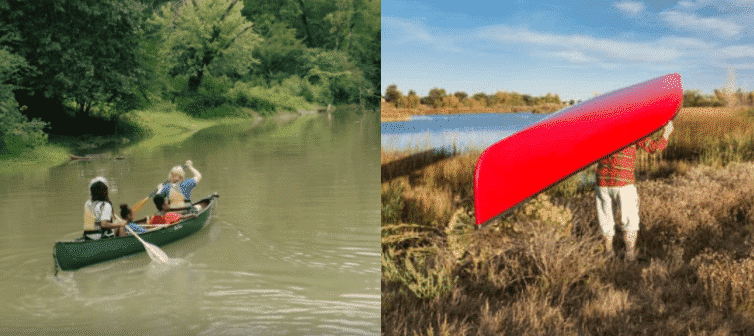
Canoe camping is a canoe lovers answer to backpacking. It blends the two hobbies together trading a loaded backpack for a gear filled canoe. Plan your route, paddle down the river, and set up camp along the way. It’s a fun way to get into the wilderness without having to hike for miles and carry a heavy pack.
Canoe camping has been making a major comeback over the last decade or two. I often meet young families that are taking their kids on 3 or 4 day canoe trips. Kids seem to love canoeing since it’s more engaging than regular backpacking. Hiking through the woods can get boring fast for children, but canoeing keeps them actively engaged.
Your paddling down the river during the day and then you get to set up camp at night. It’s an all in one trip where you can go swimming, traverse light rapids, build a fire, go fishing, cook and eat dinner, catch frogs, and the list goes on. There’s no time to get bored when you’re constantly moving and doing activities throughout the day. Even people that usually aren’t into nature enjoy canoe camping since you’re engaged every step of the way.
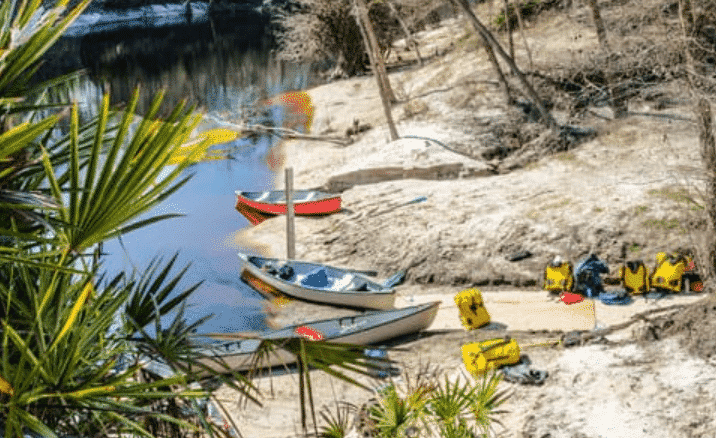
Already having backpacking and camping gear will get you most of the way, but most first timers will need to rent a canoe, life jacket, and paddles. You won’t be carrying your gear so don’t bother spending money on expensive lightweight gear if you don’t plan on backpacking in the future. So let’s get into a detailed breakdown of everything you need to do before getting into canoe camping.
Why Should I go Canoe Camping?
What makes canoe camping so appealing? The fact that anybody can get in a canoe and experience the outdoors. You don’t have to be an athlete or physically active to paddle down a river and setup camp. There are some trips that require a fair amount of skill and physical endurance, but you can always find an easy river for first timers and novice outdoorsmen.
My parents are in their 60s, not physically active, and they can easily make it down the river. So you don’t need to be an athlete! Canoe camping is a hobby that anybody can enjoy. I’ll start off by explaining a little bit about canoe camping and then get into planning trips, and go over all the gear you need to have a successful trip.
1) Planning A Canoe Camping Trip
Planning a canoe camping trip is harder than most other family vacations. You can’t pick out a destination, make reservations, and improvise once you get there. You could do that, but it probably wouldn’t be a successful trip.
You have to plan out every little detail. Where do you want to go? What route will you take? Do you have all the necessary gear and will you be able to rent everything else? How many canoes will you need? Where will you sleep? How much food will you pack? Do you need a reservation or permit? What will you put everything in to keep it dry?
The list keeps going on and on! Planning everything out might not be hard for experienced canoe campers, but it can seem overwhelming for a beginner. There’s a lot of planning that goes into a canoe camping trip that you can only gain through experience.
That’s where experienced outfitters and guides come in to simplify the process. They give you a list of all the gear you need, offer rental equipment, tell you about permits/reservations, help map out the route, and deal with the canoe launch and shuttle back to your car. You can plan out everything on your own, but a guide/outfitter will be a serious help.
Pre-Trip Planning and Choosing Your Destination
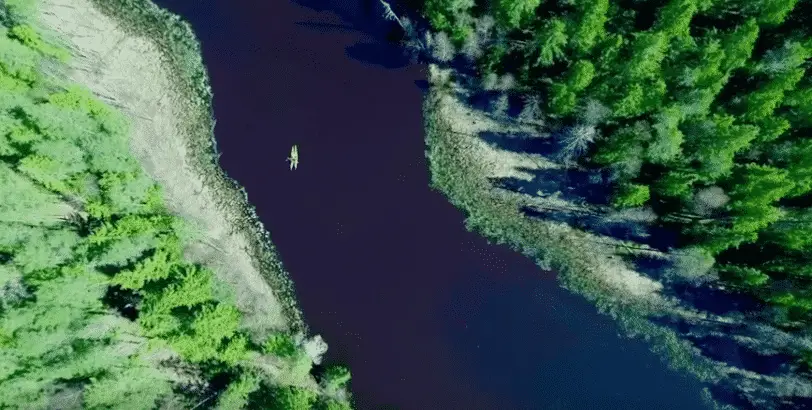
What do you think of when you picture your first canoe camping trip? I was picturing gorgeous mountain views, pristine lakes, and long endless rivers. Everybody wants to plan a grand adventure at a popular national park for their first trip, but that’s the wrong way to go!
Going with an experienced guide or outfitter will help with gear, but planning your trip will be a logistical nightmare. You have to schedule vacation time, figure out flights, rent a car to travel to the national/state park, get hotels for days where you won’t be canoeing, and then you can start planning the camping trip. Adding a canoe camping trip to a vacation you’ve already planned is one thing, but planning it all out from the start can get overwhelming fast.
Beginners Should Plan An Easy Trip First
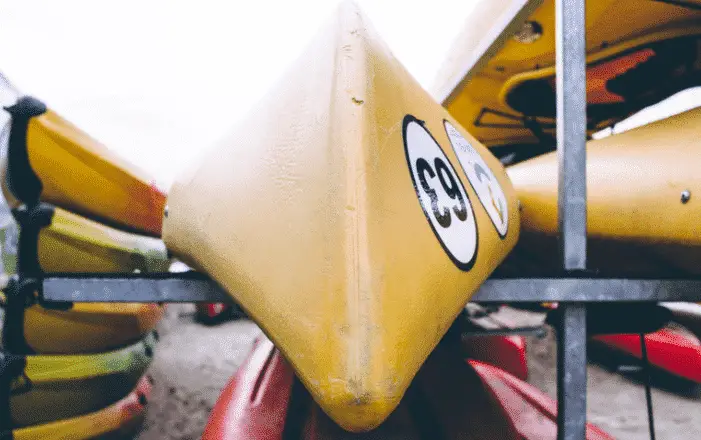
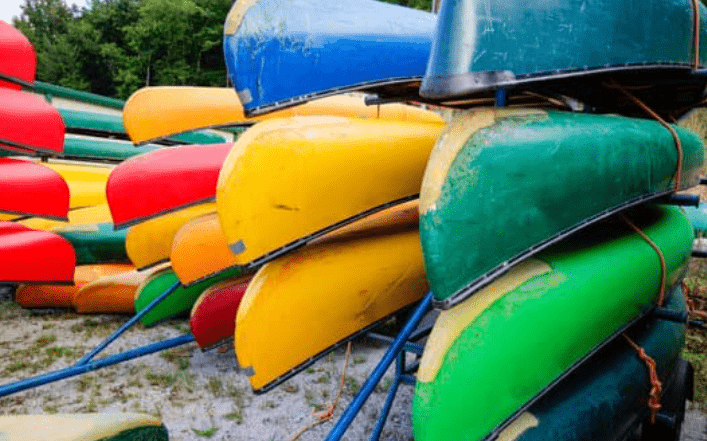
I recommend thinking small and choosing a lake or reservoir near you. You can either buy a canoe/kayak or find somewhere that rents them out locally for a few nights. Most popular vacation spots surrounding lakes have canoe rentals available and all the safety gear you need for about $40 per night. This will allow you to get into the hobby without spending a small fortune.
The only downside is you will need to already have backpacking and camping gear since their won’t be outfitters to rent everything to you. I’m pretty sure REI and some other camping stores, rent out camping equipment at an affordable price if there’s one near you.
Beginners should never practice any type of water sport alone. Plan your first trip with a friend, family member, or you can join a group of experienced canoeists that go out on the weekends. There’s a small learning curve to balancing a boat and you’ll need to learn how to deal with a capsized canoe (overturned canoe). Having a second person to flip you back over in dangerous situations is really important.
Choose a reservoir or lake near you and plan a 1-2 night trip so you can get used to the canoe. It won’t be exactly the same since you’ll be paddling in still water, but you’ll learn the basic paddling skills. You can setup camp in the same spot each night and you won’t have to worry about shuttling vehicles. Plus it will be easy to bail out if you’re not enjoying the experience.
Learn how to read a physical map and use a compass to guide you across the lake. Navigate through waterways and try to figure out where you are on the map using landmarks. Once you start paddling anywhere with a current you’ll need to learn how to steer, cross the current (ferry angles), and practice flipping a capsized canoe.
Planning A Destination Canoe Camping Trip
Beginners don’t have to plan a basic trip first, but it will help you learn the basics. The planning stage starts to get complicated once you start planning a destination trip to popular state and national parks. You have to deal with route planning, buying/renting gear, making reservations, getting permits, finding campsites, and figuring out the logistics of your launch and shuttle back.
It seems like a simple hobby, but there’s a lot of planning that goes into a short trip. You can do it all on your own, but I recommend going through a local outfitter or guide service. If you’re new to canoe camping, I recommend choosing a destination that’s somewhat popular and isn’t more than a 2-3 hour drive away.
Most state and national parks will have canoe rentals, paddles, and safety gear available for about $40 per night. Tell them what you’re planning and they should be able to guide you through the permit and reservation process.
Plus they can point out the best camping spots, give parking/shuttle info, advise on the water levels, portages, and simplify the process. It shouldn’t cost more than $300 if you already have most of the necessary camping gear. You may even be able to camp somewhere with developed facilities, toilets, showers, and designated campsites if that’s more your style. Make sure you ask if primitive or backcountry camping is allowed.
Do You Need Reservations or Permits?
Most parks on state/federal owned land will require either a permit to camp or make you register for a spot at a campground near the water. This can usually be done through the parks website or an outfitter/guide will do it for you. If all you need is a camping permit, it’s an easy process. Pay a few dollars for the permit, declare the dates you will be travelling and start finalizing your route(move to the next section).
With established campgrounds in the area, you might have to reserve a spot and book a campsite. You can’t do that until you’ve planned your route and figure out where you’ll be each day.
Planning Your Route
Planning your route can be a challenge without experience. It’s hard to estimate how far you can travel so you’ll want to give yourself some wiggle room planning out campsites. You don’t want to end up miles behind schedule desperately trying to reach a destination before dark.
Beginners should plan on moving about 2mph and keep portages short (less than 1000 feet). With a few days experience your paddling speed should get closer to 3mph, but you don’t want to feel rushed. Don’t plan on being on the water all day long. Most people overestimate their paddling speed so plan on setting up camp every 8-10 miles which has you on the water about 5 hours.
This will keep the trip fun and prevent muscle exhaustion! Your arms and back won’t be used to sitting on a canoe paddling so you will most likely be sore after the first day. Don’t Worry! You will adapt fast if you continue with the hobby so it’s better to keep the trip easy at first. Plus there will be more time to setup camp, cook dinner, focus on other skills.
Once you have a rough idea of how far you’ll be traveling, how many days you’ll be out, and you’ve settled on a route, it’s time to close the loose ends. I recommend going over the following steps before finalizing your reservations.
- Find A Park Map: Purchase a park map or see if there’s a map available online. Make sure you’re looking at a paddling map so it includes all the information you need. The map should give you campsite locations, show portage lengths, and show distances between campsites.
- Call The Park and Speak To Somebody: You can do hours of online research, but nobody knows the park better than employees that are working onsite. Reach out to local outfitters in the area, ask for prices, and speak to the local guides. They can help you find maps for the trip and tell you if the route you’ve planned sounds reasonable. It can be hard to tell if there’s low water and debris runoff blocking a route without talking to somebody that knows the area.
- Search Online for Recommendations: Go on canoe camping and paddling forums. Ask for recommendations and read everything you can find about the local camping options. You can also search on google for answers, but you never know how good the information will be.
- Deal With The Online Reservation System: Once you’ve figured out the route, it’s time to make reservations using the online reservation system. Double check the maps and figure out which camping areas you want to stay in.
Is Canoeing Faster Than Walking?
Generally speaking hiking and backpacking will be slightly faster than canoeing. On short hikes, the average person walks at a 3-4 mph pace depending on how much weights in their pack. as the day goes on you’ll slow down to a 2-3 mph pace.
In a canoe you probably won’t go faster than a 3mph average over the course of a day. You may be able to reach 6mph with a strong back current and heavy paddling, but maintaining that speed is impossible. Even with perfect technique your arms will be dead within an hour.
There are a lot of other factors that you need to consider while traveling by canoe. What’s your paddling stroke rate, technique, canoe design, and what environmental conditions are at play. You will be navigating curving waterways so a 20 mile trip on the water can look 2 miles apart on a map. There may also be debris that will slow you down on small streams and shallow areas where you will need to drag the canoe.
2) Choosing A Canoe
You have to be serious about the hobby to drop cash on a canoe. You’ll be spending over $1000 for a cheap canoe and up to $5,000 for a brand new canoe that you would get from a rental company. Don’t even look at wood canoes, because they can be close to $10,000.
There are cheaper options available on the used market, but it’s better to rent until you’re comfortable with the hobby. I will still go over a few of the different styles, but I could write an entire post on choosing the canoe alone. You have to deal with multiple canoe styles, different lengths, widths, open/closed decks, and choose between a single or double canoe.
It’s better to rent multiple styles and get a feel for them before dropping that kind of money. Every person has different rowing styles, body types, comfort levels, and personal goals that need to be considered before choosing a canoe. It would be impossible to give a one size fits all recommendation for everybody.
What Is A Camp Canoe and Are They Different From Regular Canoes?
Camping canoes tend to be wider and longer than regular canoes since they need to hold additional gear. You will sit higher in the water and the extra size makes them more stable when you’re moving around the canoe. You should be able to get up and move around the canoe without capsizing, but it takes practice.
I recommend renting multiple canoes from different rental companies to get an idea of what you like. Compare different lengths/widths, styles, doubles vs singles, and open/closed decks. You may also want to consider a large kayak or inflatable kayak. Canoes tend to have more stability and room, but you can get a really nice kayak cheaper.
Single or Double Canoe?
You can choose between a single or double canoe in all of the categories below. If you always plan on going with somebody else it makes sense to buy a double canoe. That could be a romantic partner, child, or maybe even a dog.
Just understand that a double canoe will be hard to maneuver by yourself. It will be harder to paddle, steer, flip the boat, portage through low spots, etc., but it won’t be impossible. Bigger boats can carry more gear, but understand that it will make transporting and storing the boat a challenge. Most people look in the 14ft-17ft range for tandems.
As the name implies, solo canoes are meant for 1 person. Most people look for solo canoes in the 11ft-13ft range. These are big enough to carry plenty of gear and small enough to maneuver on your own. A 14ft canoe is the sweet spot where it’s big enough to fit 2 people comfortably, but small enough to handle on your own. You won’t have a ton of space for gear, but you’ll be fine if you pack light.
Different Body Styles
There are so many different body styles to choose from and they all handle just a little bit differently. You have different lengths, beam widths, depths, bottom hull profiles (flat, round, arched, Vee’s, Keels, etc.), profiles (flared, Tumblehome, Straight side), Rockers (heavy, moderate, straight), Entry Lines (sharp, blunt), stems (square, rounded), fullness(more or less capacity), and symmetry (symmetrical vs asymmetrical).
Trying to pick out a canoe can be crazy with so many different body styles. Different models and styles will have a completely different feel on the water. I can’t even begin to give a recommendation without knowing how much gear you’ll be carrying, paddling style, experience level, river type, and who knows what else.
You need to get on the water so you can get a feel for what you like. That’s why it’s so important to rent a few times before committing to a purchase.
3) Picking Out Canoe Camping Gear
Canoe camping isn’t a cheap hobby! You can rent the canoe, paddles, and life jackets, but you need to buy almost everything else. This won’t be a problem if you’re already go camping or backpacking, but it can be extremely expensive if you’re walking into it blind.
Most people carry well over $3000 worth of their own gear when they go canoe camping. You can skimp in certain areas to keep costs down, but you still need to carry almost everything on this list. Beginners should slowly build up their camping gear over time and then start canoe camping after purchasing most of the gear.
You should definitely check out my printable 3 Day canoe camping gear checklist. It should have almost everything you need for a 3 day canoe camping trip, but it can be scaled for longer trips. There’s also lines for you to write in anything that I forgot.
What Will I Put Everything In To Keep My Gear Dry?
Keeping your gear dry in a canoe is crucial since you never know when the canoe will capsize or take on water. You can move around 1000 times without issue and then you’re in the water with soaking wet gear. Maybe gear shifted unexpectedly, you’re partner moved, or you just randomly lose balance. There are 1000s of ways you can roll over unexpectly. So how do you keep your gear dry in a canoe?
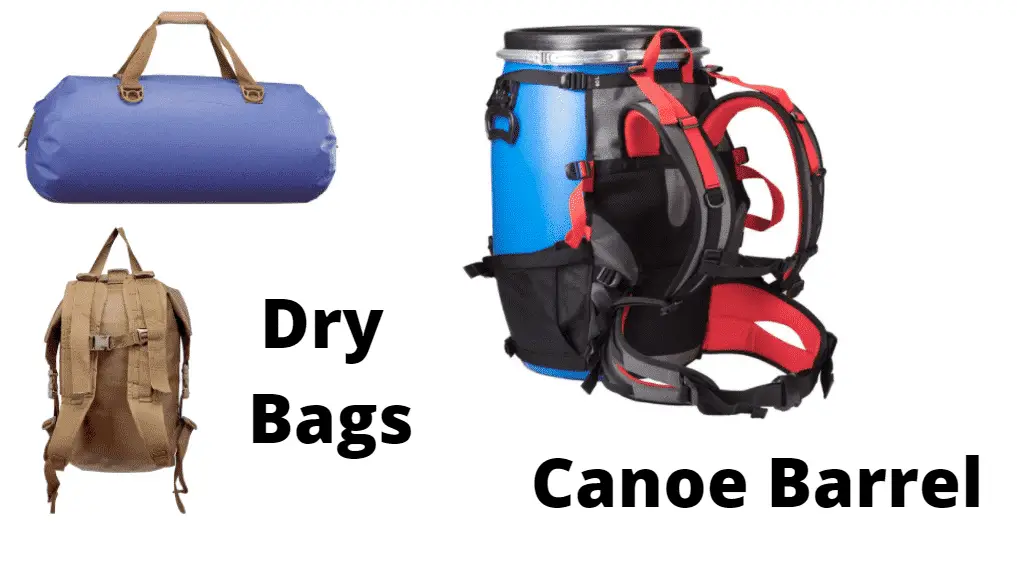
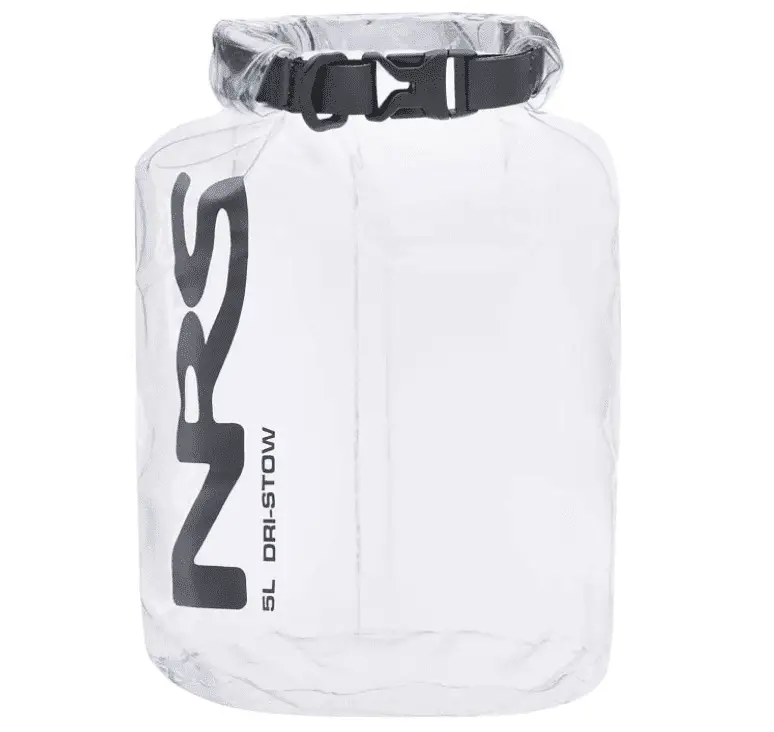
- Dry Sacks: Everything that can’t get wet should go in a dry sack, which is just a waterproof bag that keeps stuff dry. You can find dry bags ranging in size from 5 Liters to massive 50-70 Liter bags that look like hiking backpacks. I really like Watershed Dry Bags. They’re extremely durable and look like either a standard duffel bag or backpack and come in a wide range of sizes. There are lots of cheaper options available on Amazon, but they won’t feel as comfortable when using it as a pack. You won’t be carrying it all that far so it shouldn’t be a huge problem.
- Barrels: Canoe barrels are another great option. They’re waterproof and bearproof so you don’t have to worry about separating food into a bear canister. The only problem is they can be a pain to carry when they’re fully loaded and they’re bulky so offseason storage can be rough. You can also buy a harness to attach to the barrel so it works like a standard pack.
- Hiking Backpacks: Most backpackers prefer stuffing their important gear in smaller dry bags since they already have them and loading everything into a standard hiking backpack, duffel bag or large canvas bag like they use in the military. This works well enough, but the bag will probably get wet. Remember that you don’t have to keep everything dry. Some things can go straight in the bag if you don’t mind getting them wet.
Canoe Specific Gear
You should be able to get most of the canoe and paddle specific gear from whatever rental company you’re using. All you need is three things to paddle.
- Canoe: A tandem canoe can fit 2 people comfortable. You can rent a canoe at just about any large or river with a popular launch spot. Squeezing a 3rd person onto a canoe is possible, but it will be uncomfortable for the middle rider. Plus having a 3rd throws off the balance point making it wobbly. It’s fine with kids, but I wouldn’t try it with 3 adults.
- Paddle: You need to have 1 paddle for each person on the canoe and a spare in case you lose one or it breaks. Paddles are fairly sturdy so the only way to break them is if you accidentally sit/step on them or use them to flip the canoe over.
- Lifejacket: You should have 1 life jacket per person and a spare life jacket in case one of them gets damaged or left behind somewhere. Most canoes come with a life jacket, but it’s hard to say what kind they’ll be renting out. I like to wear my life jacket at all times so I bring a NRS Chinook Lifejacket. If you decide to buy your own make sure it has a high back so it won’t interfere with the canoe seat.
Safety Notice: Most inexperienced paddlers don’t wear their lifejackets since they haven’t been on the water long enough to encounter a dangerous situation. Look at any professional guide. They always have on a life jacket no matter where they’re at. Don’t be reckless! You should always keep your life jacket on, carry a first aid kit, and have some way to call for help in an emergency.
Important Safety Equipment
There are only two pieces of safety gear you need to carry at all times (plus a life jacket). You should always carry a first aid kit and some type of phone. Make sure they’re always within reach and stored at the top of your dry bag/barrel in case of an emergency. I just keep my Satellite phone in my first aid kit so it’s all in one place.
- Phone (Cell Phone or Satellite): Most places in the United States have cell service, but you may need to buy a satellite phone (InReach Mini Sat Phone) if you’re camping in the middle of nowhere. I recommend looking on eBay for a used satellite phone since they’re rarely used and you’ll save a lot of money. Satellite plans only cost $15 per month so it’s well worth the money since you will only be paying on an as needed basis.
- First Aid Kit: You’re not limited by pack weight so I recommend going with a full sized trauma first aid kit. You don’t have to spend a lot of money on a professional kit(something like this works), but make sure it has everything you would need to stop major blood loss.
What To Store In The Canoe For Easy Access
I like to carry a small 10L dry bag in my canoe with everything that I could possibly need while on the water. It includes everything that I might want during the day in a convenient place. Each person in the canoe should have their own personal dry bag. Here’s everything that goes in my personal bag.
Cell Phone: I like to have easy access to my cell phone so I can stay in contact with my family that stayed at home. Every once in a while I’ll send a quick “I’m Still Alive” text along with my location and estimated arrival time. I also carry a portable power bank to recharge my phone throughout the trip.
Toilet Paper: You never know when you’ll have to stop on the side of the river to answer natures call. Pooping/peeing next to a waterway introduces viruses into the water so try to make it 100ft away from the river. That can be hard with steep embankments, but try your best to find an open spot.
Toiletries: I keep my toothbrush and toothpaste in here even though I’m not going to use it on the water. This is mostly so I don’t lose them in the bottom of my pack.
Sunscreen and Bug Spray: You’re bound to get sunburn sitting on a canoe all day and you never know when you’ll run into a swarm of mosquitos. Insects are especially bad in the heat of summer so make sure you have bug spray ready.
Sunglasses and Hat: Once again this is for protection against the sun. I usually don’t like to wear sunglasses, but the glare on water will give you a headache if you’re not wearing sunglasses.
Light Jacket or Pullover: I usually carry a light merino wool sweater in case the temperature drops or wind picks up. You can also go with a fleece jacket or windbreaker, but merino wool seems is better at resisting water. It might not seem like it, but wool can hold up to 30% of its weight in water without feeling wet.
Rain Gear: You don’t have to spend a lot of money on rain gear. Just make sure whatever you buy is vented in some way to prevent sweat and condensation. Rain jackets can get seriously clammy when the outside temperatures lower than your natural body heat.
Camera: Most people use there phones as a camera these days, but I like to carry a small mirrorless camera. I take a lot of nature photography and my cell phone doesn’t give me the same picture quality. I don’t want to lug around the DSLR I use for work so I’ve been carrying a Canon EOS M200 Mirrorless. I’d probably cry if I dropped it in the water, but it stays in the dry bag 99% of the time.
What To Wear On A Canoe
Canoe clothing needs to be quick drying and comfortable. Go with a light technical fabric athletic shirt, gym shorts or hiking pants, and trail runners (they dry fast). You should also have a bathing suit nearby in case you feel like going for a swim.
Quick Dry T-Shirt: Any quick drying shirt that you’d wear to the gym will work. Think along the lines of Nike, Reebok, Under Armor, etc. with technical synthetic fabric. Your shirt can get wet and it will dry in 20-30 minutes and they speed up evaporation from sweat.
Hiking Pants or Gym Shorts: I plan my canoe trips around the weather so I’m usually wearing basic gym shorts. In cooler weather I’ll bring my hiking pants so I don’t have to worry about getting them wet and sweating through the butt.
Swimsuit: Most people like to take a quick dip in the water on hot days. So pack some type of bathing suit. Just understand that a bikini may be uncomfortable if you’re wearing a life jacket. Plan on wearing a shirt over top of it to prevent chafing from the life jackets straps.
Quick Drying Shoes: Some people like Crocs or Sandals, but I prefer the same trail runners I camp in. You have more grip and leverage on the bottom of the boat and they dry fast. It takes less then 20 minutes for my trail runners to dry when they get soaked with water.
What To Wear Around Camp
You need to have an extra set of dry clothes to wear around camp. Just about anything will work since you probably won’t be hiking all that far after a long day on the water. Wear whatever you find comfortable and make sure you have a light jacket for when the sun goes down. I just wear whatever I’m planning to sleep in so usually a pair of sweatpants and a clean t-shirt.
Don’t jump into your clean clothes immediately once you get to camp. Unload everything from the boat, setup camp, collect some firewood, and maybe even wait until dinners ready. You don’t want to get changed into clean clothes and then have to muck around in the mud.
I always carry an extra pair of clean dry shoes and Smartwool socks to wear around camp. Any pair of closed toe shoes will work, but make sure they’re comfortable. You don’t want to settle down for the night and put on a pair of heavy boots.
Dry Shoes: Any pair of comfortable closed toe shoes will work. I like to wear my old gym shoes that since I don’t mind if they get dirty.
Fresh Socks: I always wear a pair of merino wool socks around camp. They’re extremely comfortable, water resistant, warm in cold weather, and cool in the summer. Plus you can wear the same pair for multiple days straight since they resist sweat and have antimicrobial properties. Sleeping bags tend to be colder in the feet than the rest of the bag so a warm pair of socks will solve that problem.
Clean Shirt: A plain old cotton t-shirt or long sleeve shirt is all you need.
Weather Appropriate Jacket or Sweater: Fleece pullovers always seem to offer just the right amount of warmth and they’re water resistant. You may need to wear a heavier jacket on cold nights.
Comfortable Pants: Wear whatever you normally wear to bed or whatever else you feel comfortable in. Some people go straight to their regular blue jeans, but I toss on a pair of sweat pants. Just make sure all the works done so they don’t get dirty.
Long Johns (optional): You might need to wear a pair of long johns to bed depending on the weather and your sleeping bags temperature rating. Add a sleeping bag liner to your bag if you’re expecting a particularly cold night.
Shelter and Sleep System

Tent: You don’t need to spend a lot of money on a tent since trail weight doesn’t matter on a canoe. Buy a halfway decent tent and toss it in a dry sack so it doesn’t get wet. I use my backpacking tent, but any cheap tent will do.
Sleeping Bag: Make sure your sleeping bags temperature rating is warm enough for nighttime temperatures. Try to go with a sleeping bag that’s at least 15°F warmer than the lowest expected temperature. You can use a sleeping bag liner to add extra warmth to your bag.
Sleeping Pad: Since weight isn’t an issue you can go with both a foam and insulated sleeping pad. Sleeping pads get you up off the cold ground and provide a soft place to sleep.
Sleeping Bag Liner (optional): Sleeping bag liners serve two primary purposes. They keep dirt, sweat, body oils, and other debris out of your bag, and increase the bags temperature rating. A cheap Coleman Liner will add 12°F of warmth to your bags temperature rating. I use a Sea To Summit Reactor extreme liner that adds 25°F of warmth to my bag. I use a light 45°F with the liner on cool nights and use the liner by itself on warm nights.
Basic Camping Equipment
Think about the 10 essential pieces of gear every camper needs to carry. Here’s the 10 essentials: Navigation, Headlamp (plus batteries), Sun Protection, First Aid, Knife (plus a gear repair kit), Fire, shelter, extra food, extra water, extra clothes.
The 10 essentials doesn’t cover everything so there will be a few gaps you need to fill, but that’s a great place to start. Here’s everything I carry in my pack regardless if it’s a canoe camping trip or backpacking trip. I went over a few of the important items above, but I figured it would be easier if everything was in one place.
Standard Camping Gear
| Large Dry Bag To Store Everything (watershed dry bag) | Sleeping Pad (Foam or Inflatable) |
| Tent (Stakes and Guylines) | Headlamp with extra batteries (Black Diamond Spot 350) |
| Sleeping Bag and Compression Stuff Sack (cheap option) | 10 Liter Personal Dry Bag |
Food and Water
| Hydration Pack (Nalgene Water Bottle Backup) | Snacks (energy bars, trail mix, drink mix, etc) |
| Water Filter or Purifier (Purification Tabs as backup) | Extra Days Supply of Food for emergencies |
| Meals | Seasonings, Salt/Pepper |
| Coffee Supplies (Optional) |
Cooking Supplies
| Backpacking Stove (MSR Pocket Rocket) | Mug/Cup (Lightweight Titanium) |
| Fuel Canister | Biodegradable Soap (Campsuds) |
| Cookset (Toaks Titanium Pot and Pan) | Microfiber Towel |
| Ultralight Backpacking Bowls/Dishes | Collapsible Water Container |
| Utensils (Bring Backups) | Bear Canister or Food Bag and Nylon Cord to Hang |
Clothing and Footwear
| Backpacking Stove (MSR Pocket Rocket) | Mug/Cup (Lightweight Titanium) |
| Fuel Canister | Biodegradable Soap (Campsuds) |
| Cookset (Toaks Titanium Pot and Pan) | Microfiber Towel |
| Ultralight Backpacking Bowls/Dishes | Collapsible Water Container |
| Utensils (Bring Backups) | Bear Canister or Food Bag and Nylon Cord to Hang |
Navigation Equipment
| GPS | Compass |
| Paddling Map With Waterproof Sleeve |
Emergency and First Aid
| Ultralight First Aid Kit (My Favorite) | Itinerary (Carry 1, and leave a copy with a friend at home) |
| Emergency Whistle | Emergency Shelter and Emergency Blanket |
| Lighter and Matches (Bic Butane Lighter in Dry Bag) | Fire Starter For Emergencies (my favorite) |
Gear Repair
| Multi-Tool or Knife | 10 ft of Duct Tape |
| Repair Kit for Tent, Stove, and Sleeping Pad |
Health and Hygiene
| Hand Sanitizer and Biodegradable Soap (Campsuds) | Prescription Medications, Advil, Tylenol, Benadryl, etc. |
| Toothbrush/Toothpaste | Prescription Glasses, and Contacts, Solution, Etc. |
| Menstrual Products | Blister Treatment and Chafing Supplies (Desitin, HikeGoo) |
| Cathole Trowel and Toilet Paper | |
| Pee Funnel for Women (Optional) |
Sun and Insect Protection
| Sunglasses | Hat |
| Lip Balm | Insect Repellent |
| Sunscreen |
Extra Items
| Dry Bags and Stuff Sacks | Books and Reading Material |
| Pack Liner (Compactor Bag) | Cards and Games |
| Sleeping Bag Liner | Binoculars |
| Camera With Extra Batteries and Memory Cards | Two-Way Radios |
| Pencil and Paper | Field Guides |
Personal Items
| Necessary Permits | Car Keys |
| Wallet, Credit Cards, Drivers Licenseand Cash | Cell Phone and Power Bank |
4) Balancing The Canoe and Pack Light
When you’re trying to pack your canoe focus on minimizing the load and balancing your gear. Keep the weight evenly spread from one side/end of the canoe to the other. You can carry more than you would normally bring on a backpacking trip, but you should try to avoid overloading the boat. A heavy boat will sink deeper into the water making it easier to capsize.
Keep all your heavy items in the center of your boat near the main brace. Heavy items need to go where they’ll least affect your balance and then you can layer the lighter gear up and out from the center. Tuck everything low in the boat and try to tie everything off with quick release knots to avoid dumping your gear. I have a handful of carabiners to clip on and use bungees to strap everything down.
Balancing your load isn’t all that difficult, but an unbalanced boat can be harder to maneuver. You’ll sit deeper in the water and drift off to one side due to uneven paddle strokes. This isn’t a huge deal on calm water, but the head/back of your boat can dip into water if you’re dealing with rapids.
Pack Light
Even though the water is carrying the load you still need to haul around all that extra gear. Steering and paddling an overloaded canoe can be difficult so try to cut out all the unnecessary junk. Plus there’s not a whole lot of room in your canoe.
You never know when you’ll have unexpected portages or run into a dry creekbed so pack light. All your clothes, sleeping gear and tent should go in dry bags and kitchen gear/food should be placed in water tight containers.
I typically just keep all my food in a bear canister(here’s how to figure out how much food you can fit in a bear canister). Some people build wooden containers to go in their canoe, but you can typically find a lightweight plastic container at Walmart for like $10.
5) Getting To The Canoe Launch, Parking, And Shuttling Home
Getting to the canoe launch and back to your car is one of the biggest challenges most first time canoe campers have. There are two ways you can do this. If you’re renting a canoe there should be a shuttle service to pick you up and bring you back to the launch. People that own their own canoe leave one car at the launch and park another at the end of the route to bring all their gear back to the launch.
Most beginner canoe routes are loops so you won’t have to deal with a shuttle service. You start and end at the same point so there’s no need to shuttle back and forth between the launch (aka put-in) and end of the route where you take out the boat.
At some point you will want to travel down more advanced routes and shuttles will be necessary, but I would start off with a simple loop or lake/reservoir trip so you don’t have to deal with shuttling back and forth.
6) Basic Paddling Skills
You should be able to pick up basic paddling skills throughout the first day on the water. Make sure you get the paddles deep in the water and stroke evenly from one side to the next. It shouldn’t take long to learn the basic paddling technique.
Paddling with a partner can be a challenge for beginners, but you’ll learn quickly. It’s different from solo paddling since you don’t have to alternate paddling sides to move forward. The person in the forward position (bowman) has to set the row speed and the back (sternsman) follows suit and controls 90% of the steering. Forward position is only in charge of navigation in rapids and difficult terrain where he needs to call out directions taking control of navigation.
Try to keep your center of gravity low in the boat and avoid moving out of center alignment. As you stand up and move farther away from the center point the canoe will shift and roll. If you go too far you’ll end up rolling the boat over (capsized), and need to flip it right side up.
Practice dealing with a capsized boat by rolling over close to shallow water and trying to flip the boat back over. Flipping and climbing into a canoe is easy in shallow water, but it can be a serious challenge away from shore. You need to swim under the canoe’s edge and lift it back over.
That’s the easy part! Now you have to lift your self up by using your partner as a counter balance or the downward pressure against the water surface to get into the boat. The easiest way is to lift your body up and curl into the bottom center of the boat. Once everybody’s inside, paddle to shore and drain out all the water.
7) Water Navigation and Portaging
Water navigation is fairly simple. All you need is a planned route, paddling maps, compass, and most people prefer to use a GPS as well. Just make sure your maps are laminated (laminators are cheap) so they won’t get wet on the water, carry a backup map, and leave a copy of your route with a relative/friend.
You need to be able to read a map and understand basic orientation skills using a compass. Use landmarks, portage locations, and estimated travel times to get a rough idea of where you are on the map. Navigating from one park owned campground to the next is easy, but estimating your location in primitive spots can be tricky without a GPS. Most beginners overestimate their paddling speed and end up a little bit short of where they think they’re at.
Paddling maps should have all you need to navigate through common paddling locations. They should include portage info, rapids ratings, public comfort stations with restrooms/showers, and the locations of park owned campgrounds that you can stay along the way.
Most people can get by using only a map, but you might want to rely on a GPS as well. There’s cell service throughout most of the United States, but you should be able to download maps to your phone for offline use. I recommend looking at cell coverage maps to figure out if you’ll have cell service. There are multiple paddling apps you can download with maps and everything you need to know about most common paddling routes.
Satellite phones with GPS maps might be necessary in remote areas outside the service range. Garmin satellite GPS phones seem to offer the best value for the price. I recommend choosing a satellite phone on Amazon and then look at eBay or the secondary market for a used phone to save some money. I picked up a Garmin inReach Explorer+ use d for about $350 off the normal price on ebay a few months ago.
Most people use their satellite phones a handful of times per year so used phones are generally in like new condition. You will also need to pay for a satellite phone plan for about $15 per month, but the plans are on an as needed basis so you cancel at any time.
I like to send an “I’m Still Alive” text a few times per day with a rough idea of where I’m at to family members that I left at home. That way if anything happens they’ll be able to narrow down my location for the search and rescue team. Plus you will always be able to call for help in an emergency.
How To Portage A Canoe
Nobody likes portaging their canoe. It’s by far my least favorite aspect of canoe camping. A portage is just the traditional term for whenever you have to carry gear from one body of water to the next. You have to portage your canoe whenever you reach a spot where you can’t continue on the water. It’s usually in shallow areas, rocky structures, debris blockages, dangerous rapids you’d rather avoid, and lots of other situations.
Most people learn how to portage without ever realizing they’ve learned how to do it. It’s whenever you have to get out of the canoe and carry it from one area to another. Here are a few tips to make portaging east.
- Pack Light: Easy portaging starts before you ever hit the water. Pack light and try to minimize the number of loose items in your canoe. You’ll have to carry every little thing from one side to the other so gather everything up in large dry bags or canoe barrels.
- Keep Portages Short: Try not to choose a route with lots of long portages. I like to keep my portages under 200 yards (sometimes measured in rods) max and that would be a serious haul. Some people don’t mind portaging longer distances, but it can be exhausting for a beginner. You have to carry the canoe on your back and then go back for all the gear.
- Empty The Canoe: Once you get to the portage everything in the canoe needs to come out and be set off to the side out of moving water. Make sure the gears out of the way so other people can use the portage at the same time.
- Carry Your Canoe: I recommend carrying your canoe first since this is by far the hardest job. Getting the hard part over first will give you a minute to catch your breath while you’re walking back to get the rest of your gear.
- Carry The Packs, Dry Bags, Barrels, Paddles, Etc: Carry everything else to the other end of the portage and load it back into the canoe. This is one of the main reasons why you should try to pack light and consolidate gear into one large dry bag. You shouldn’t have to take multiple trips back and forth to get all your gear and having lots of tiny items will almost guarantee you leave something behind.
8) Finding A Campsite and Setting Up Camp

Finding a campsite and setting up camp is a fairly simple process. It’s really simple if you’ve made reservations at a park owned campground. Just take your boat out at the docks and the campground staff will send you to your designated spot.
Picking out a spot with a backcountry camping permit will be a little bit harder, but that’s still easy. Just find a suitable location close to where you planned on staying during the route planning phase. Look for open areas with easy water access that won’t require a climb up a steep bank.
Setup camp about 100ft away from the water and try to get up on higher ground. You never know how the weather will be so you don’t want to pitch your tent right next to the water. Waterfront views are nice, but rivers/lakes are natural low spots so water will drain towards them. Getting up to higher ground will keep you safe if there’s a storm and the water level picks up.
Start off by unloading the boats, pitching your tent, set up your sleeping area, gather firewood, build a fire. I like to get all my camp chores done before putting on my clean camp clothes. You don’t want to get dressed into your clean clothes/shoes and then go mucking around in the mud gathering items from the boat. Once all your camp chores are done it’s time to settle in for the night, cook dinner and deal with water purification.
9) Planning Meals, Cooking, and Water Filtration/Purification
Try to plan all of your meals ahead of time so you’re guaranteed to get enough calories in each day. Paddling down the river can be exhausting so you’ll burn through more calories than you think. Plan on bringing at least 2,500 to 4,000 calories worth of food per day.
Pack weight isn’t a huge factor so it’s always better to bring more food than you actually need. Canoe barrels are bear resistant, but you’ll need a bear canister to store all your food. I recommend the Large BearVault BV500, because it holds 7 days worth of food for one person and it’s affordable. The screw on top works like a pill bottle and doesn’t need special tools. Plus it’s big enough for a weekend trip for 2 people making it the perfect size for a tandem canoe.
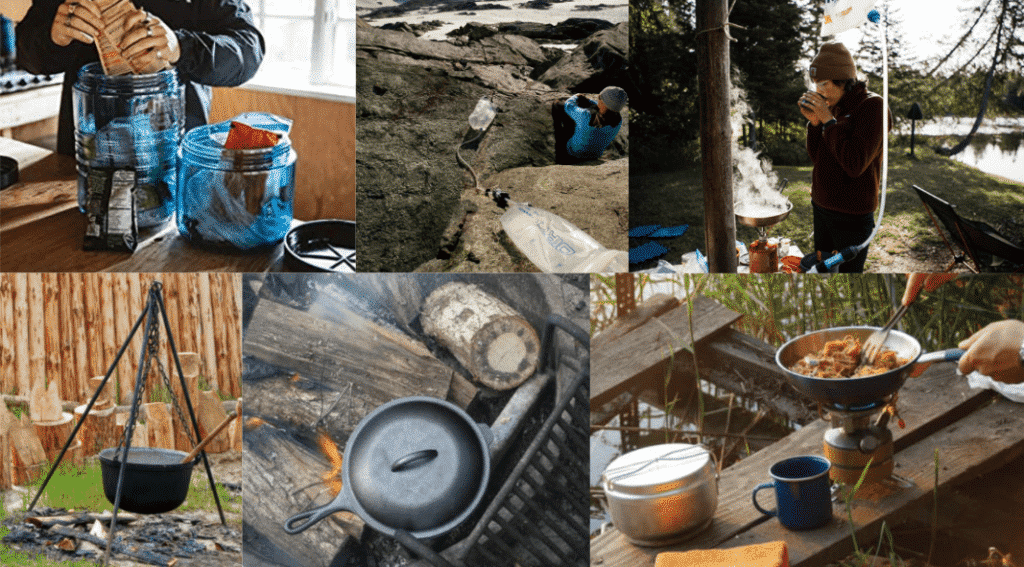
The next thing you need to focus on is water purification. Most canoe camping groups rely on gravity filter setups (Platypus Gravity Filter) since you can purify a large amount of water fast. Just fill up your dirty bag with river/lake water and let gravity force the water through your filter into the clean water bag.
Most large groups do 90% of their camping over the fire using a cast iron pan. If you’re traveling with multiple canoes, you might want to also bring a Coleman 2-Burner Liquid Fuel Stove that runs off of white gas or kerosene. Portaging can be a pain if there’s limited adults so smaller groups may want to keep it simple with a Jetboil to speed up the boiling process for pasta and other easy dinners.
Cooking With Cast Iron Pots and Pans
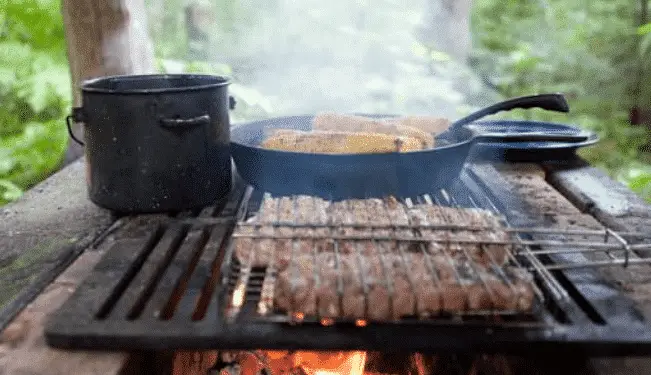
Cooking with cast iron pans is fairly simple. Make sure the pans are pre-seasoned, add some oil to the pan, and cook directly over the fire. It takes a while to heat up your pan, but cast iron cooking is one of the best ways to cook for large groups.
You can boil water on a campfire, but you’ll need a way to hang the pot above the fire. A Cast Iron Camping Tripod (like this one) makes cooking over a fire easy. Just make sure you wear heat proof gloves when you handle the pot/pan and give everything a few hours to cool before handling it without gloves.
You don’t want to get a nasty burns miles away from civilization with no way to call for help. That’s why it’s so important to carry a full sized first aid kit when you’re in the backcountry. Being able to temporarily handle burns and minor wounds can buy you some time until you can receive real medical attention.
Leftovers should be buried to avoid attracting animals and then you will need to clean your pots/pans. With cast iron pots/pans you don’t want to rinse them out with soap and water, because it will ruin the seasoning process. Nothing should stick to the sides of cast iron so wipe everything out with a rag and scrape off burnt residue with a cast iron pan scraper.


